hair
COTTON CANDY BUN + THIN GOLD HEADBAND
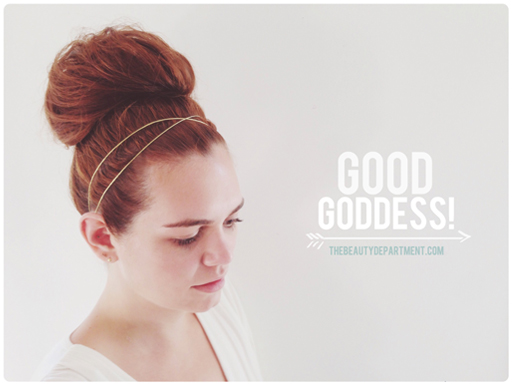
HI! Let’s take a short break from our “Summer Braid” series in the hair department, shall we? A couple days ago I posted a photo on instagram of a client wearing a very voluminous bun on set. I jokingly referred to it as her cotton candy bun which was followed by a lot of requests for a tutorial, so why not?! This is exactly the way I did hers so follow along and recreate the look at home. I’ll also show you how I made that thin goddess-y headband!
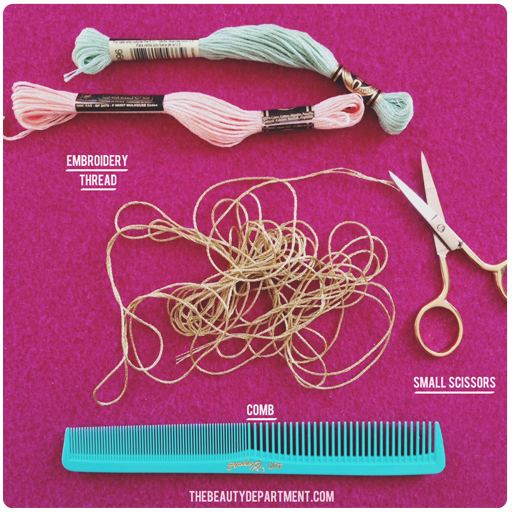
You’ll need some embroidery thread. I love the metallic kind and above we used gold but you can use any color you want; mix, match, cooridinate with your dress, whatever! You can usually find embroidery thread at your local fabric/craft store. Here’s a link in case you can’t find it near you. A whole lot cheaper than most headbands these days! Okay, let’s get to the tutorial steps…
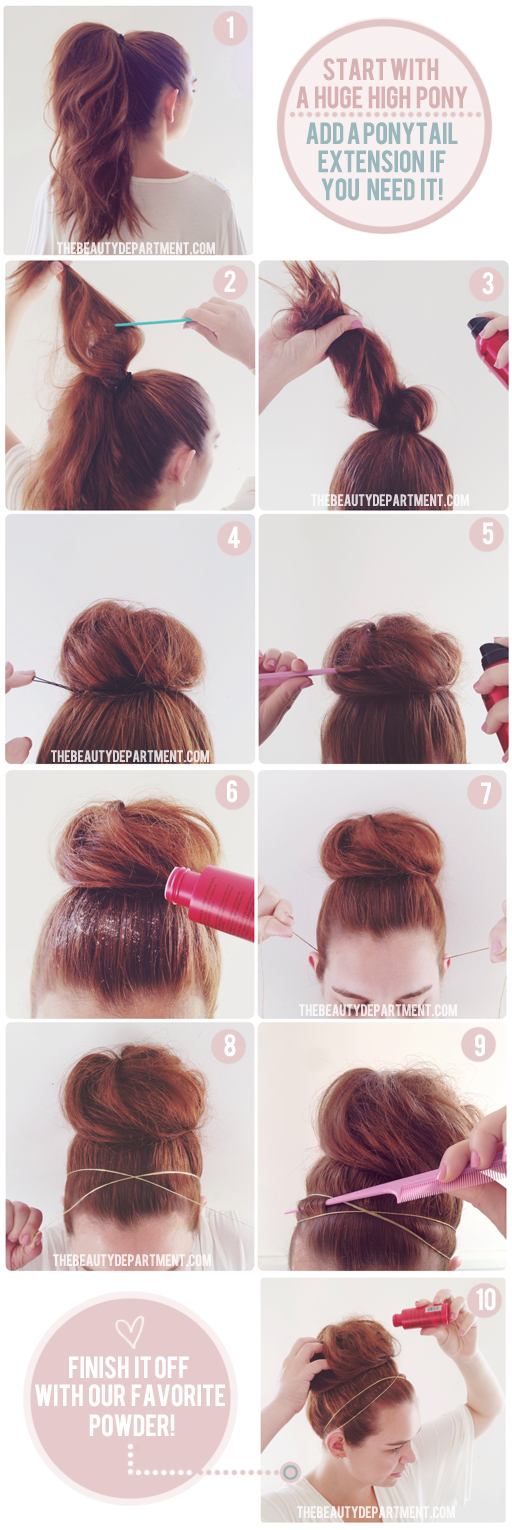
- Start with a clean, dry, wavy ponytail. You want the ponytail to be large enough to create major volume in your bun making! If you need to add some extensions, try doing it like we did in THIS TUTORIAL! Give it a little wave with a wand or curling iron to plump it up even more!
- Now you’re going to use your comb to tease sections lightly. Don’t make it into a rats nest, you just want to give it a few slow, long back-combs with the wider side of your comb. Remember, you’re not teasing for height, you’re just teasing for more volume so be gentle on that hair!
- Take all of your ponytail in one hand and give it a light spray. Here we’re using this strongholding hairspray by Sexy Hair. Now twist it into your high bun shape.
- Start pinning around the base of the bun. Make sure you’re using strong bobbypins!
- I forgot to photograph it but, you should also grab a tail comb. That’s what we used (as you can see in this photo) to gently pull at the bun while adding a little more superholding hairspray. I like doing this more than using my fingers because it doesn’t smash anything. It’s such a tiny tail and you can work it into the middle of the bun to pull more volume pretty easily! Tail comb > fingers.
- Now you’re going to need more of that magic pixie powder they refer to as texturizing powder. Remember? We discussed it in detail right HERE! Sprinkle a bit of that in front of the bun. This is going to help hold the embroidery thread in place, big time! I sprinkle it all the way around the bun, even in the back by the nape of the neck because nothing disappoints more than your headband sliding while you’re out and about. The powder is mattifying so it keeps the hair from having any slip. It’s magic I tell you.
- Take about a yard of embroidery thread. Start in back as you see in photo 7. Bring it up and around the front past your ears.
- Cross it over in the center. Switch pieces into the opposite hands after you cross it over and then tie it together near the nape of your neck. If you don’t have the texturizing powder, you’re going to have to do a lot more work to get this thread to stay put. Lots of hairspray and a couple tiny bobbypins should do the trick.
- Once you’ve tied your goddess headband in the back, take the tail of your tailcomb and pull a little in between the strings. I just prefer the look over the hair being flat under the bands.
- Now for the final step, pour a little bit more of your texturizing powder over the bun and break it up with your fingers until it has that cotton candy bun look!
Will you try this? If you do will you pleeease tag us so we can see it? Last week we posted a bunch of your Twishtails on our IG, which looked SO amazing by the way. Find us at @thebeautydept and let us know once you’ve posted by hashtagging your with #TBDcottoncandybun


