hair
SUMMER BRAID 4
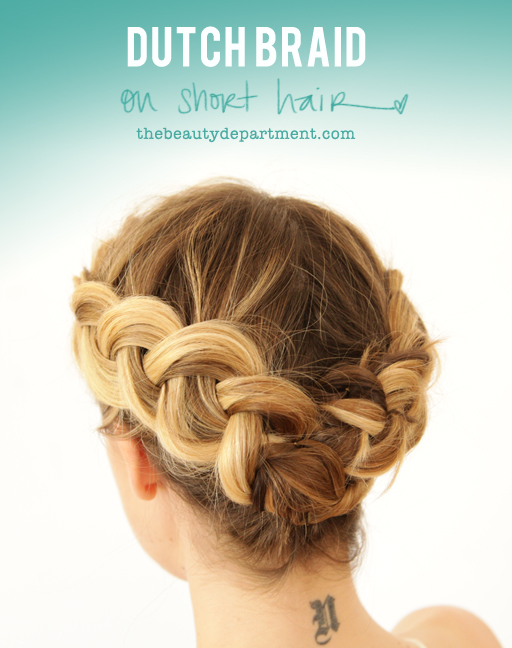
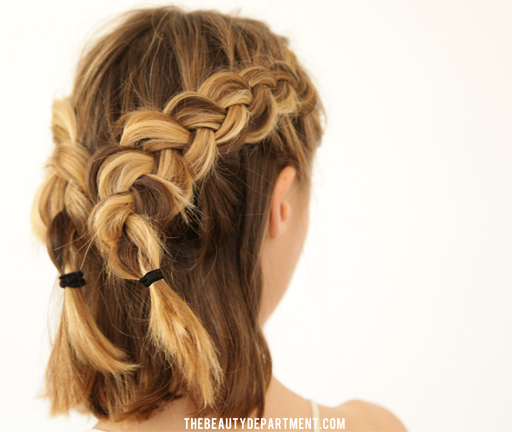
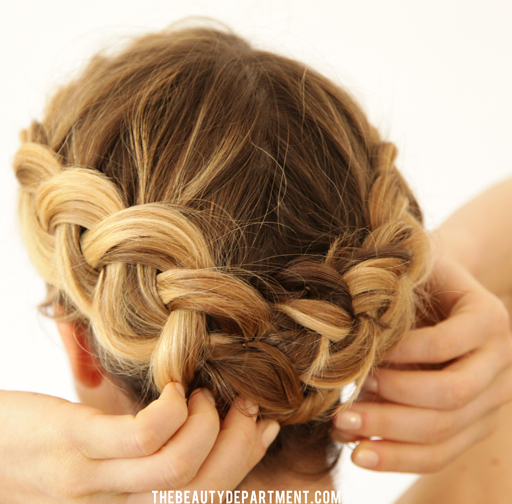
All summer the subject of braids will be a big one around here. Last week we talked about a trick for bulking and voluminizing your braid. Many requests rolled in for a tutorial on the actual braid that was done in that post. Well here it is! I have to be honest, when I asked Nora to sit in on this post I had completely forgotten that we chopped off her hair a few months ago. It was up to her chin and now it’s around her shoulders. But I still wanted to do the tutorial on her head because it leaves me a great opportunity to show you guys how to cheat a dutch braid (aka: an inside-out braid) on hair that is between the chin and shoulders. I’ll show you how we did it, but I split up our normal tutorial so you could really see detail in the larger individual photos. Here we go…
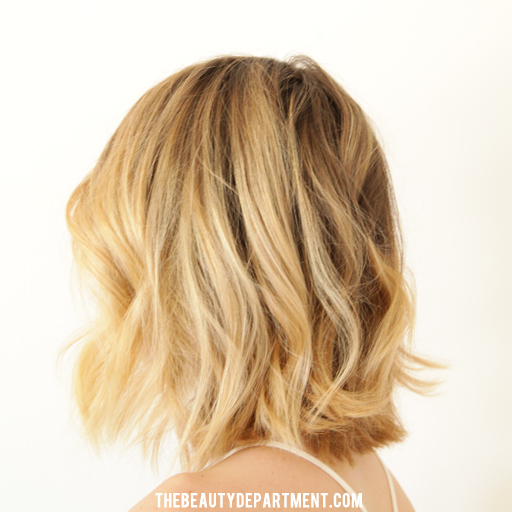
1. Start with clean dry hair. I like to give it a little bit of this kind of wave before getting started. I avoid adding product when I start braiding. If I need a little something to keep the hair from feeling too clean, I use a dab of waterbased pomade and massage it in at the root!
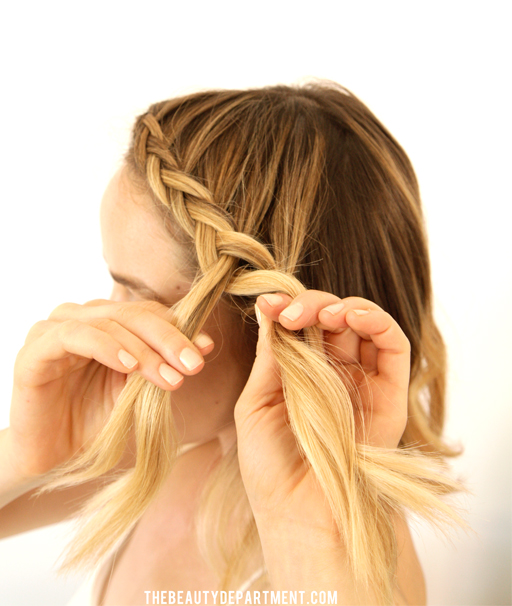
2. Next, begin dutch braiding where your part meets your forehead and continue along your hairline. Doing a dutch braid: simply push the sections under each other instead of crossing them over the top each time. In other words, if you’re french braiding and you would normally grab a new piece and cross it over, push the new section under each time.
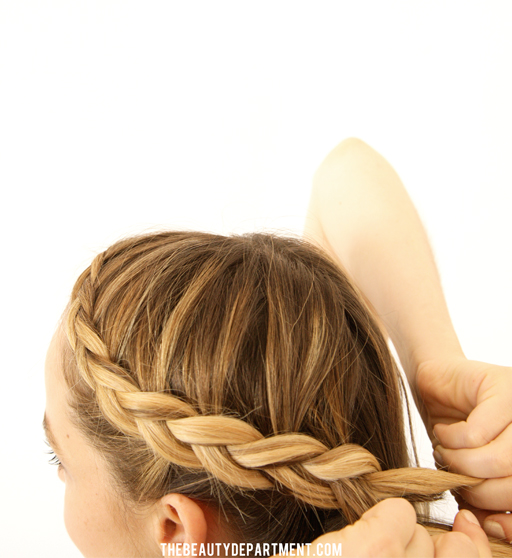
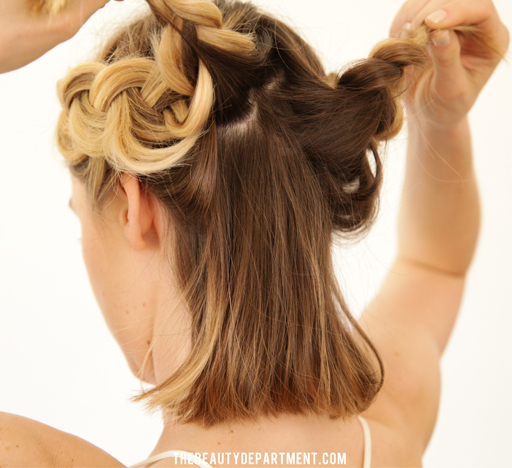
3. Once you reach the ear, switch hand/arm positions. You will now need a mirror in front and a mirror in back to watch as you go, or if you’re good at french braiding, you can probably just feel it out. My suggestion is to stop around the bone in the back of your head (it’s called the occipital bone or o-bone for short). Braid the tail and tie it off with an elastic.
4. Once you complete the braid on that side, repeat on the other side. Also at this point you must use our “bulking your braid” trick to get it to look like this. Now you should have something that looks like this.
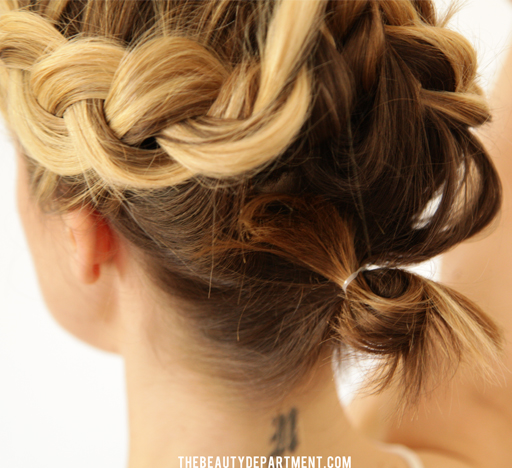
A closer look! As you can see, it’s never going to be perfect sectioning in the back if you’re doing this on yourself. If any hair wants to fall out of the braid, let it! It will fall into this section and next we’re going to put it up.
5. Create a small loop or even a ponytail using the hair that wont reach up into the braid. Use a clear elastic or a thin one at least. This is what you’re going to use as an anchor for the two braids and you’re going to have cleaned up all those short hairs that fall out. Spray a little hairspray on there if you think it needs it!
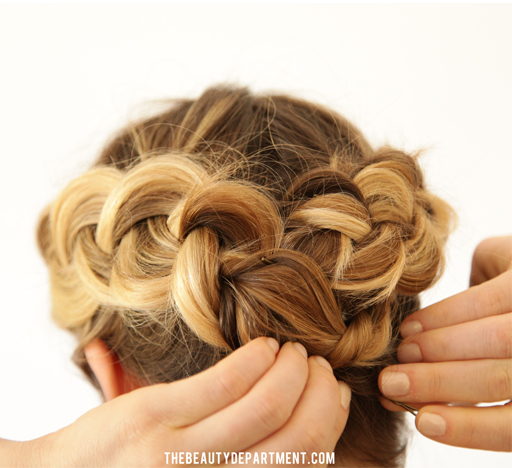
6. Take both braids, cross them over each other in an “x” shape either over or under the bun/pontyail anchor, whichever looks best to you. Now wrap the remainder of the braid, then tuck and pin the ponytail holders so they don’t show. Use large bobbypins to secure the hair to that bun/pontail anchor.
7. Use either small bobbypins or “u-pins” to secure further. Maybe do a veil of my new favorite strong holding hairspray when you’re all done!
Please show us your hair if you do this one! Tag us in your photo on Instagram!


