tutorials
NAILED IT!
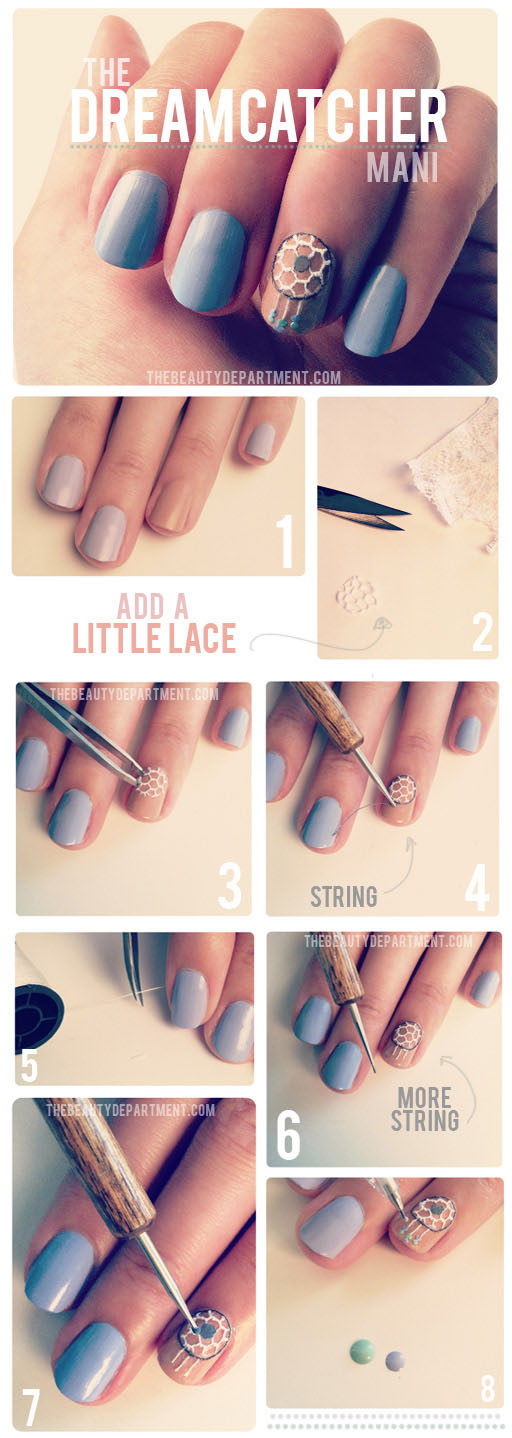
Have no fear, the dreamcatcher mani is here! We obviously have a love affair with nail art at TBD, and now we’re adding little more dimension. For this look, I grabbed a couple things from a craft box– some lace, grey string and white string. Let’s get to it!
- I painted all but one nail a lovely shade of St. Lucia by Essie, then did an accent nail with Nude Now by Sally Hansen.
- Next, cut a small circle out of a piece of lace. Try to cut the circle from somewhere you see a good pattern.
- Lay down a generous (non-quick drying) clear coat and then stick your lace circle to it.
- Measure out a piece of string that will reach all the way around the lace circle. Cut it a little longer and then you can snip off the excess. The best way I find to lay this down is to lightly drag it through a little clear coat, lay it around the lace and then tap it down with a dotting tool.
- Now, cut a few tiny pieces of white string.
- Again you want to drag them through a little bit of clear coat, lay them down and tap them using a dotting tool just like you did to lay down the string in step 4.
- Use a dotting tool to lay down a generous dot in any color you choose. Here I just used a nice charcoal-y grey.
- And finally, use the mechanical pencil trick to make tiny dots at the ends of your white strings.
When you finish, go over everything with a clear coat to secure it to the nail. This is a very fun accent nail to have. And of course, if you sleep with your hand over your head it will filter out any bad dreams. : )


