hair
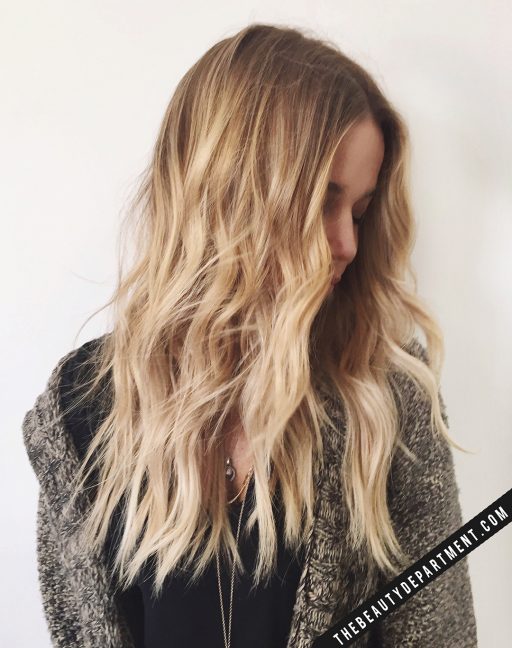
BEST BEACH WAVES EVER
photo/post: kristin ess
photo/post: kristin ess
Summer is fast approaching and we’re not wasting any time. These are likely to be your g0-to waves of the season. I did these on Emily who has very fine hair that is very long. You can definitely do this on shorter lengths, but I would go with THIS WAVE TUTORIAL for any length above the bra. I love this because the messier it gets the better it looks. You can wear it to the beach and/or wear it for a couple days. Even more so, I love what these waves do to highlighted hair color! Okay, let’s get straight to it!
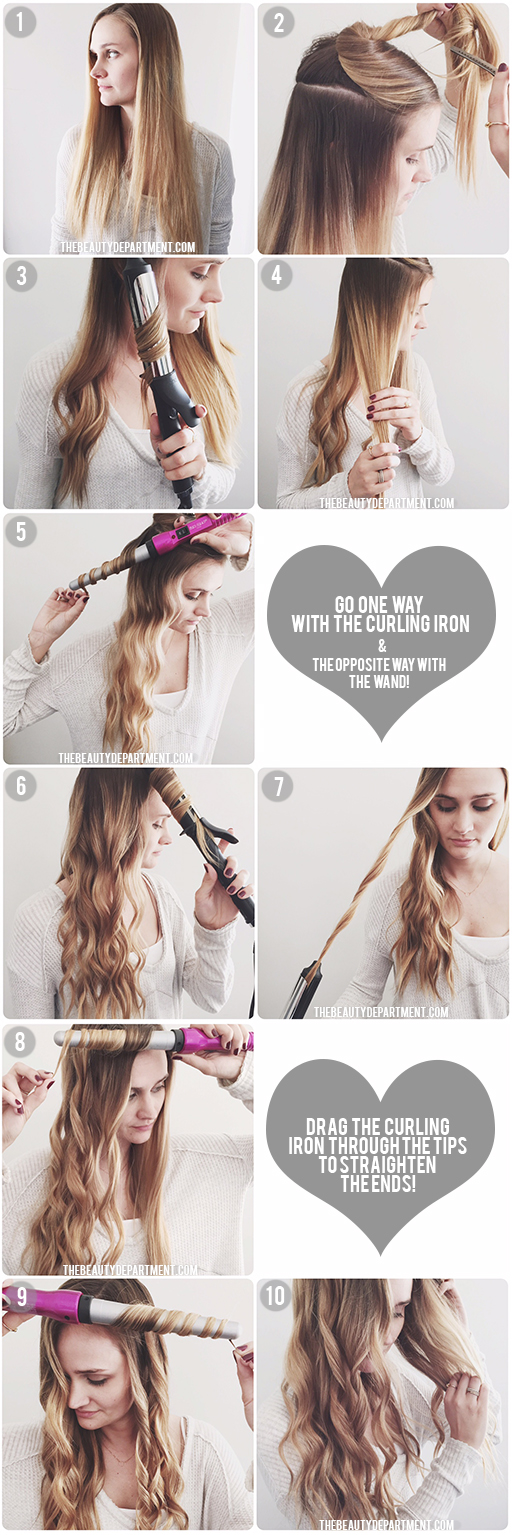
YOU WILL NEED: You’re going to need two separate irons for this look. One would be a curling iron. Here, we’re using THIS ONE. It’s ahhhh-mazing and it’s worth every penny, but it’s not super budget friendly. A more affordable alternative to that iron is THIS ONE which we’ve talked about a million times. As far as wands go, I’ve been loving THIS WAND since I got it a couple years ago and I see no reason to switch! This wand is relatively inexpensive, lightweight and comes with a glove to avoid burning yourself! You’re also going to want a HEAT PROTECTANT SPRAY, POMADE and SERUM.
- You can either air dry or blow-dry. You can also prep the hair with a lightweight MOUSSE or THICKENING SPRAY if you think your hair needs extra hold support.
- Divide your hair into 1 1/2- 2 inch sections. If your sections are too big, the curls won’t looks as beachy, but if they’re too small they can get stringy or frizzy with this technique. Make sure to stay within 1 1/2- 2 inches.
- We start with the section closest to the ear with the rest clipped up. It’s optional at this point to spray a light hold styling spray or heat protectant on the section. Curl back and away from your face. When you get to the ends, drag the curling iron out slowly to straighten the tips a little! (skip to photo 7 if that sounds confusing)
- Now take your next section down and clip the hair back up. Again, stay within the 1 1/2- 2 inch section rule!
- For this section you’re going to curl the opposite way using your wand. When you use a wand you hold the end piece out while the rest is being curled, so it’s automatically going to leave your ends looking straighter, which is great!
- Keep alternating. The next section is curled back and away from the face using a curling iron.
- Now you can see how once you get to the bottom of the curl, you gently drag the curling iron out to avoid “springy” curly ends. You want that more relaxed look and this is a great way to get it.
- One more time with the wand, wrapping the hair toward the face.
- Then you would do the opposite side the same way. Since Emily wears a side part, there are only 3 sections on the side with less hair. Still alternate the same way.
- Once you’re completely finished, don’t brush the hair. Take your serum and pomade and mix them together in your palms until they’re nice and blended. Work that mix through from middle to ends!
That’s it! Those are the 10 (fairly) easy steps to the best beach waves ever. If you try these, we’d love to see them! We’ve had a lot of requests for super long hair, so I’m trying to accommodate some of those while keeping all my bob and lob girls happy, too! Hope you enjoyed this and if you try it I would love to see it so tag us in the photo @thebeautydept on insta! xx