hair
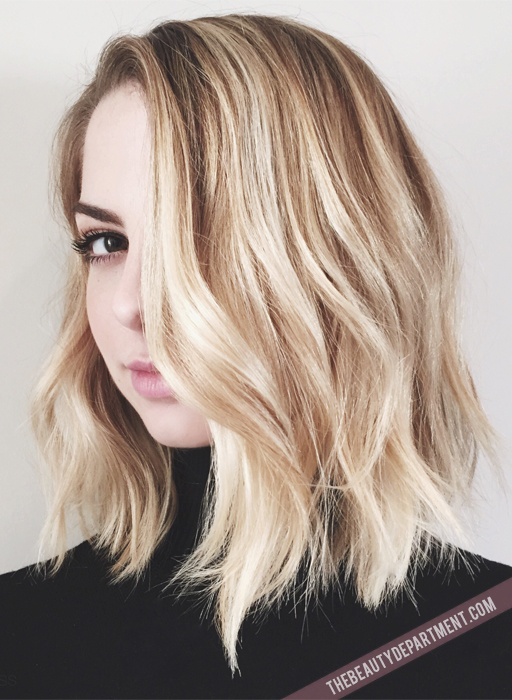
HOW TO STYLE A LOB OR A BOB
PHOTOS/POST/GRAPHIC DESIGN: KRISTIN ESS
PHOTOS/POST/GRAPHIC DESIGN: KRISTIN ESS
There’s no way I could go one more day without posting this tutorial! I’ve had requests on here, on the gram, on pinterest, on my cell phone and in person for this tutorial and TODAY is the the day, y’all! Many have mentioned that they’ve been very inspired by all the bobs and lobs out there– so much that you went in for the chop. Problem is, looks great leaving the salon but you can’t mimic it at home, right? Let’s fix that! This is one of my favorite ways to style a lob or bob (I typically do it the same way for both) and I fully believe that you can do this! Don’t psych yourself out, just act cool. We’ve enlisted the help of one of the most beautiful beings we know, ALLIE MARIE EVANS. She’s hilarious and gorgeous and very smart so we thought we’d beg her to take a break from her YouTube channel to come help us out with this look. Here we guh!
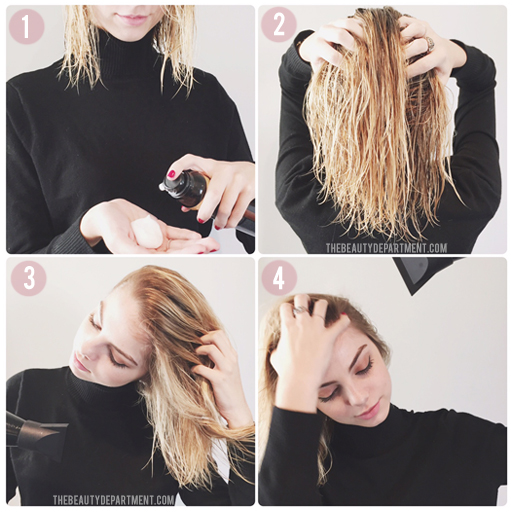
PREPPING THE HAIR:
- You’re almost always going to want a styling aid for this. Nothing major, just a light weight mousse like THIS, THIS or THIS.
- You’ll want to make sure you distribute it evenly. Use a comb or a brush to move it through if you need to.
- Begin rough drying with the nozzle on your dryer. THIS is my classic favorite as far as dryers are concerned. For the most part I like to use my fingers to rough dry the hair, maybe brushing lightly if something tangles up.
- Give it a good flip to the opposite side to keep it from feeling flat. Once it’s all the way dry, detangle with a gentle detangling brush.
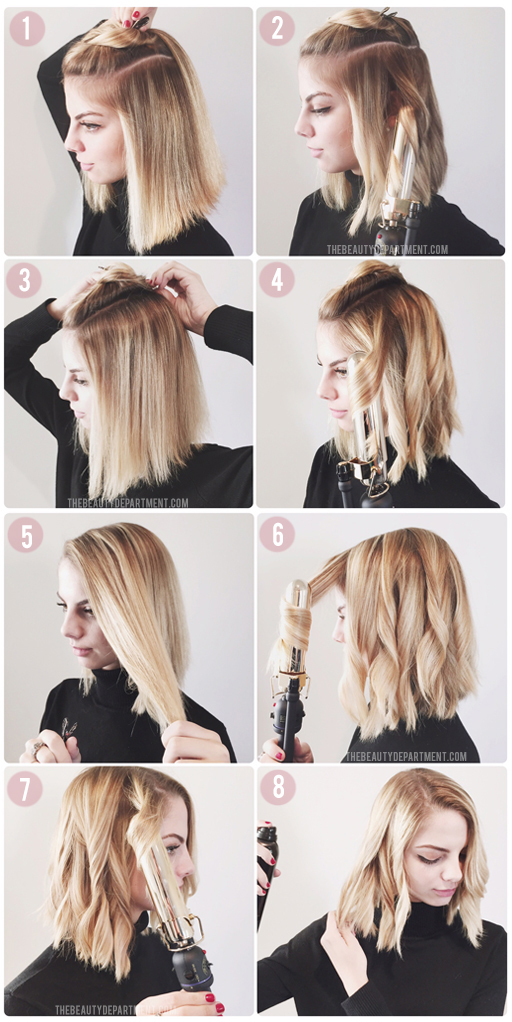
CURLING: The objective with this technique is to break the hair up into 3 horizontal sections. Then you’re going to want to curl each section in a different direction.
- Ali is doing a heavy side part in this tutorial so the sections will be a little larger on the heavier side. Begin by clipping up your first section.
- Using THIS 1 1/4″ barrel curling iron, curl pieces back/away from the face.
- Clip up your next section above that one.
- You’re going to want to curl this section forward/toward the face.
- Now your 3rd section should come down.
- This section will be curled backwards/away from the face as well.
- Do the same thing on the other side. If you’re doing a heavy side part like Ali, you can split the less heavy side in 2 sections instead of 3, but you’ll still alternate directions for each section. In other words, if you split it in 2, curl the bottom section toward your face, then let down the top section and curl it away from your face.
- Add a veil of lightweight hairspray all over for a little extra support. You don’t need to spray your sections before you curl because the mousse that’s dried in will give you all the thermal styling hold you need.
DON’T COMB OUT YOUR CURLS UNTIL THEY’VE COOLED.
MOST IMPORTANT TIP:
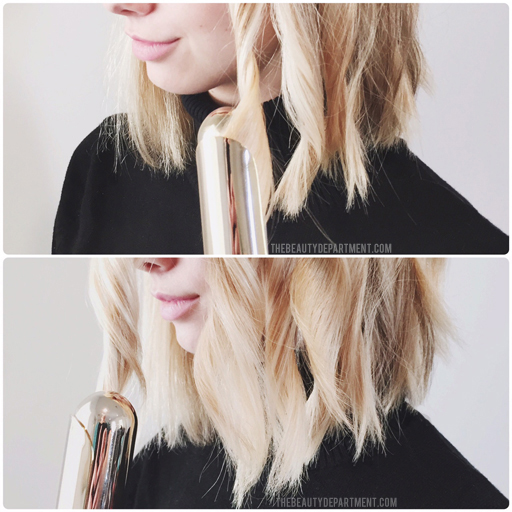
One of the most important things you’ll want to do on each section when you curl is “drag” the curling iron out. As you see we’re using a marcel iron (aka: the iron you see a lot of hairdressers using) but you can definitely still do this with a regular spring iron. You just inch the curling iron toward the ends and then lightly “drag” it out when you’re almost to the ends, which creates more of a straightened look at the tips. If that technique is hard for you, you can always quickly/lightly tap the ends with your flatiron.
FINISHING:
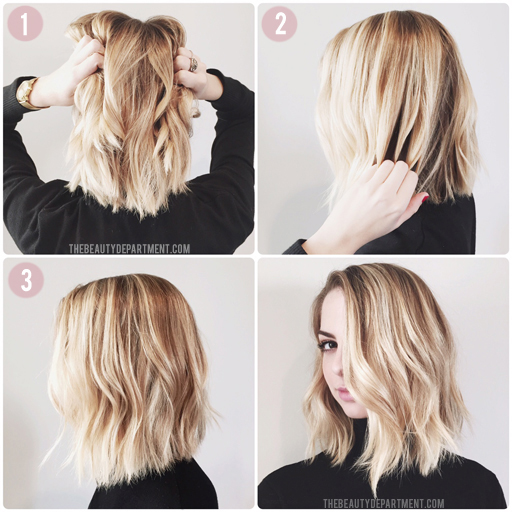
- Work your hands through the hair in a scrunching motion first.
- You’ll start to see a tousled but pretty texture emerge. This is the point where I like to add my favorite product cocktail of a serum like THIS or THIS mixed with a lightweight water-based pomade like THIS or THIS. I rub them together in my palms and work it in at the root for a little extra texture. Then whatever is left on my hands gets dragged through the ends.
- Check the sides and back with a hand mirror. Add a little more spray if needed.
I hope this helps you gorgeous gals who have been trying to get your hair right since you cut it. If you do decide to try this and you love the way it looks, add it to the #cleartheshoulders hashtag on instagram! It’s so fun to see how you all style your bobs and lobs! Good luck!