hair
TYPES OF CURL
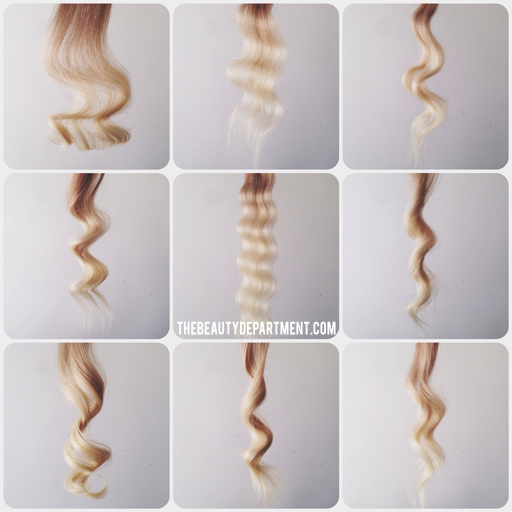
Yesterday I was thinking, we really need a way to show each kind of curl. Not the natural curls that you get from good genes, but the kind you strive for when using your curling iron, wand or even a flat iron. I think this will be helpful moving forward so that when I post hair new tutorials I have a specific post to point to and reference the type curl I’m using to get that hairstyle. In this post, we’re only using a 1″ barrel curling iron because this isn’t about iron size, it’s about curl method and what type of curl each technique produces. Okay, let’s make a “Curl Catalogue”, shall we?
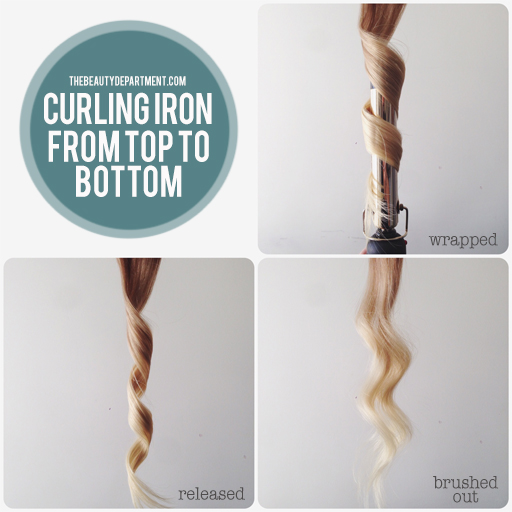
This is the kind of wave you find in our EVERYDAY WAVES video. You start at the top or middle and inch your way down. This is my go-to all time favorite way to curl because it’s so easy and quick. You also get a little extra hold when you start from the middle or top because you’re applying iron heat directly to that portion of the hair, which will help so much with hold. I specifically love this because if you have any frizz, the clamp, which is also hot, presses the hair to seal both sides, unlike a wand where you would have one side open (but we’ll get to that below).
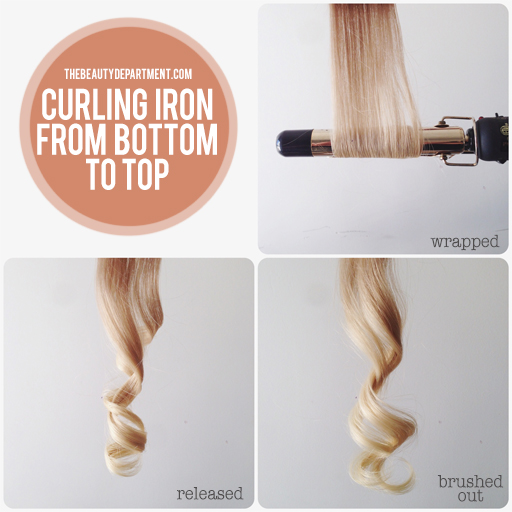
This is one of my least favorite curling methods for anyone with bob length or longer, and it’s usually the one we’re taught first by our sisters, aunts, grandmas, moms, best friends, etc… when we’re young. You’d think it would make sense to start at the bottom and curl upward, but curling from the ends up puts most of the heat on the ends and very little on the middle which is where we need it most. Long run, this just dries out your ends and curl will fall out much quicker than it will if you use the “middle to ends” method up top. This curl is bottom heavy and will tend to make anything longer than bob length hair look super “triangular”. Know who this IS great for though– women with short hair who want a fuller “roller set” look.
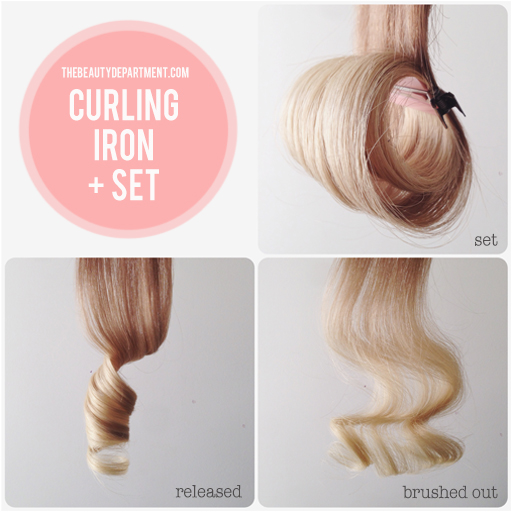
If you like the look of the “Ends to Middle” method above but find that it doesn’t hold, or if you want that Old Hollywood glam vibe, try this one! Curl your hair, then set it with a setting clip and let it cool until all of the heat is gone and the hair is cold to the touch. I still like to start in the middle and inch my way down to the ends so that I can apply direct iron heat to the middle of the hair instead of just frying the ends until the middle gets hot enough. But when you set it and let it cool, you have a much higher chance of it holding the way you want it to.
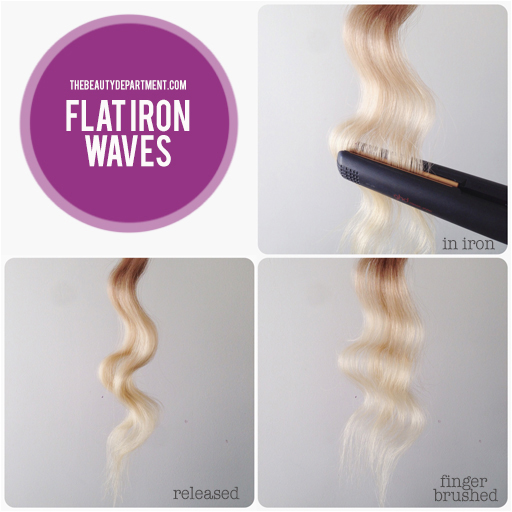
Hello, heaven. These are the best for shorter hair because you can control where you put the dips + bumps much more than you can with a curling iron. Flat iron waves can be done on any length of hair, as you can see we did it on long hair in this tutorial. It takes a while to learn, but once you get the hang of it, it’s so easy and fast.
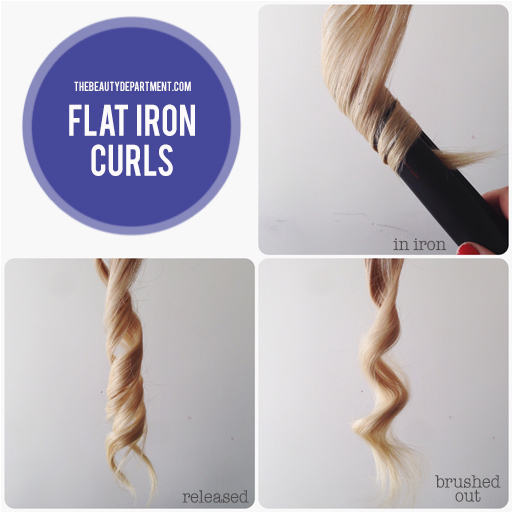
This is an amazing technique for all our natural texture girls or anyone who wants to spend a day away from their naturally curly hair. I have some clients who have beautiful natural curl, but every once in a great while they want to have curling iron waves, too! Using a flat iron to curl means you’re pressing the hair from both sides, eliminating puffiness or chance of frizz while you curl. It’s not something I recommend doing every day, but more on occasion. Pressing heat into your hair from both sides with a powerful flat iron every day could cause dryness, in my opinion. But then again so can any hot tool so just be mindful! If you don’t need the additional heat, then try the curling iron method at the top “Curling Middle to Ends”.
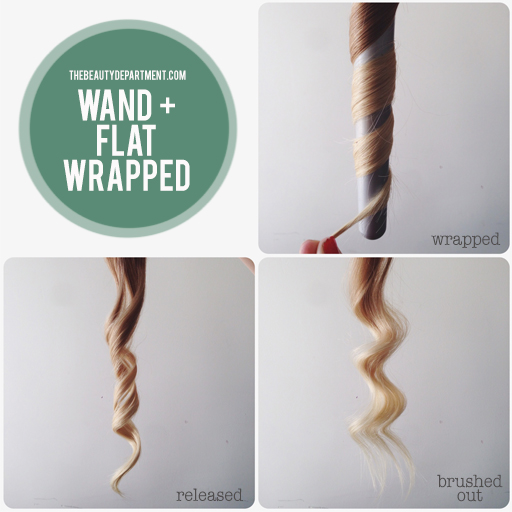
Okay, the WAND! People love a wand. The best thing about a wand is that you’re going to get lots of volume. There’s nothing pressing on the other side (like a clamp) so the hair can stay full even while being curled. In other words, it’s not being “smashed” against the hot barrel. With this method, you can see that the hair is being wrapped flat against the barrel with no twisting. The effect is a very pattern-y curl once it’s brushed out. This is my favorite for fine hair who wants voluminous waves! To keep the hair flat against the iron, you’ll have to adjust your hands each time you go around the iron, otherwise the hair will naturally want to twist around the barrel. Practice with the wand off first!
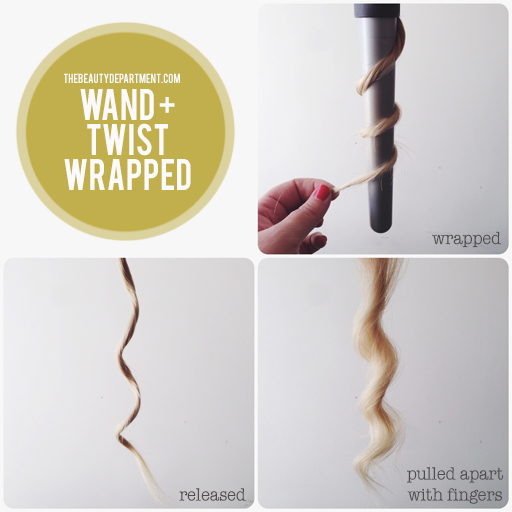
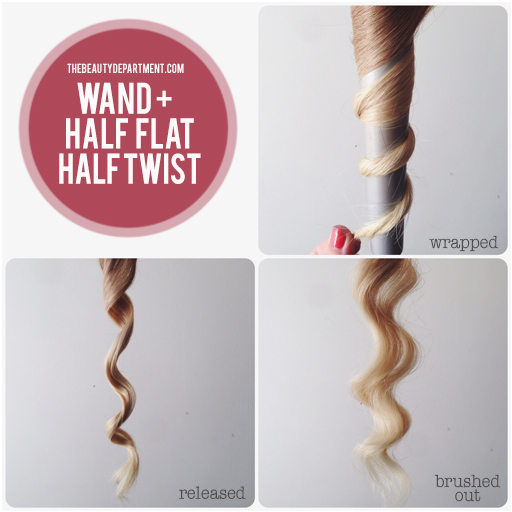
Wand way number 2! Love this for anyone trying to refine a natural curl. Twist the hair before you wrap it. Not super tight, and make sure you twist the direction of the natural curl pattern. Wrap it around the wand, release, and then gently pull and fatten it up with your fingers. I love this because the pattern, much like natural curl, isn’t exact. It’s a little tighter in one spot and a little looser in another. This is great for wavy girls who have an unruly patch of frizz.
This method is going to give you a more “boho-y” look all over. You’ll get a curling iron-like pattern up top and loose, tousled waves at the bottom. I love this for super long hair or anyone with really thick hair. Start by flat-wrapping at the top, then when you get to the middle, don’t let go of the hair, just keep wrapping and it will naturally coil.
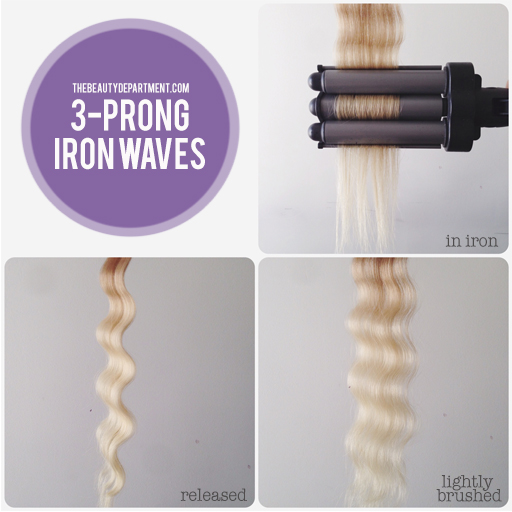
Last but not least, the mermaid-making 3-prong iron. This is also called a waving iron. You can definitely see the pattern it makes. It’s almost like a larger, rounder crimper. Whenever I used this, I like to switch up my angles. So for example– I will press it perfectly horizontal and then move down a section and do it slightly diagonal. This makes the pattern look a little more natural and breaks up the crimped look. I would use this if I was attending a beach wedding and wanted to channel Daryl Hannah from Splash.
Okay, now spill it! Which one is your favorite method and what type of hair do you have? Would love to hear about it in the comments below because your feedback could greatly help another reader who is trying to find their new favorite…


