tutorials
NAILED IT!
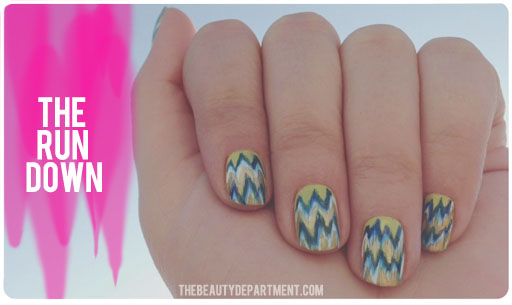
I’ve always loved the artwork below and I finally figured out a way to get a similar look in a mani. It’s different than a regular chevron pattern because it’s slightly more abstract and free-handed. I love the way one color runs over into the next one.
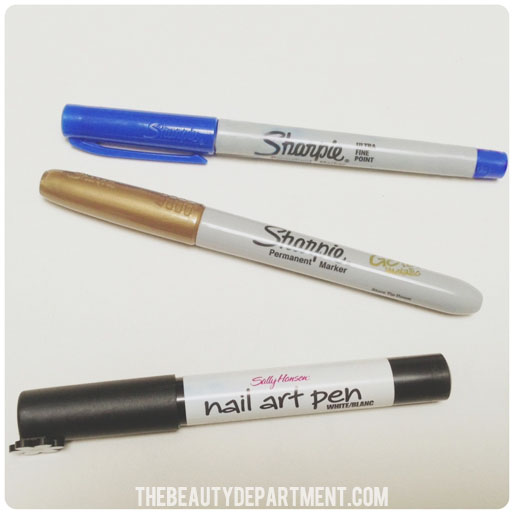
You have to find the right pens- some that run/smear as you slowly apply a topcoat, and others that stay put. Through trial + error, I found that these ones that worked best together:
- Sharpie “Ultra-Fine Point” regular maker (will run/smear). I chose blue.
- Sharpie “Gold Metallic” Pen, which you may remember from this mani. (These don’t run if you apply a topcoat quickly, but they do if you drag the brush through very slowly.)
- Sally Hansen nail art pen in white. (Won’t run.)
Whatever colors your choose to use, I suggest putting a white zigzag below a darker zigzag. That way you can really see it when it smears over the white.
The steps to this are pretty simple:
Start by prepping your nails with a bright color as a base– try hot pink, coral or green. I used THIS ONE. You don’t want to do this on bare nails because it could stain. I waited about 2 hours for the green to really harden so that there wouldn’t be any “sticking” when I was using the pens. If you have time to let the color dry over night that’s even better!
- Using your Ultra-Fine tip Sharpie, make a zigzag pattern horizontally. You don’t want it to be overly pattern-y. Might sound silly but I tried thinking of an electrocardiogram pattern from when a doctor is looking at your heartbeat.
- Follow the ultra-fine pen with your Sally Hansen nail art pen.
- Next use your gold metallic Sharpie in between.
- Last, take your topcoat and slowly add a layer. The lines will smudge into each other creating the look. Wait for that first topcoat to dry entirely before adding another if desired. You’ll want to wipe off your topcoat brush each time as it will get a little color on it. I used polish remover and a paper towel.
If you want to see a short video clip on running the topcoat over, you can see it on our Vine! We’re “The Beauty Department”.
By the way, if anyone knows the name of the artist who made that image above, I would love to know so I can credit them! xo
UPDATE: Artwork is by the insanely talented Jennifer Moreman.


