tutorials
NAILED IT!
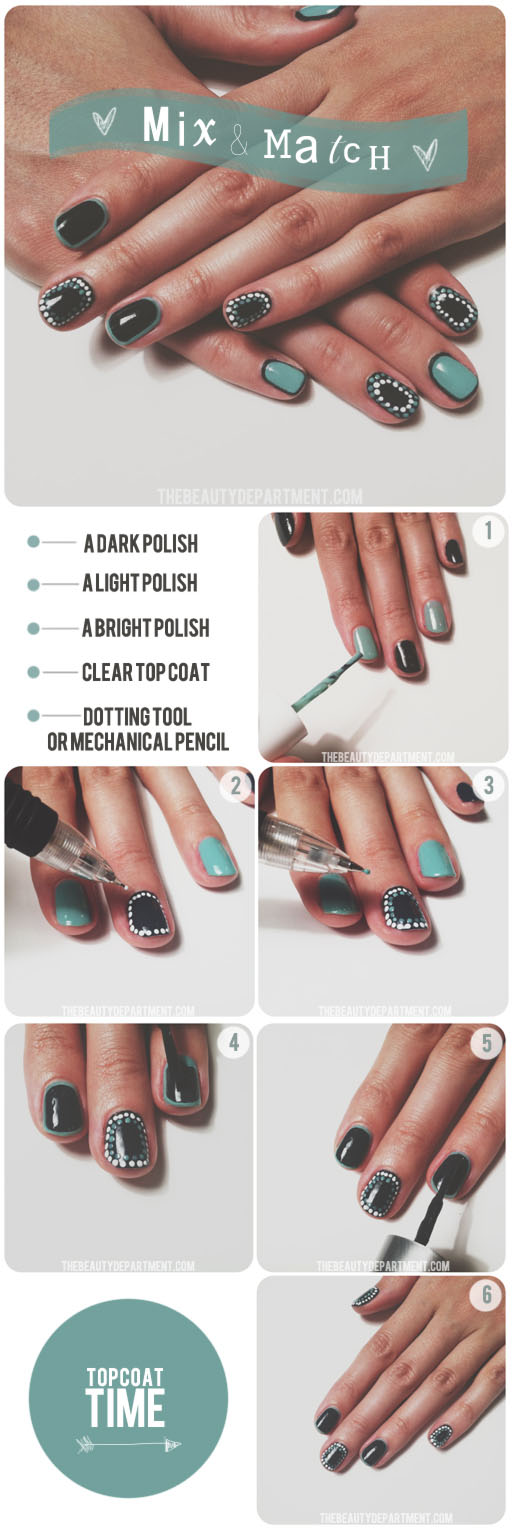
We haven’t done a mix & match nail in quite a while so we thought it was time! While we love painting one nail a different color than the rest, but we also love alternating a pattern. This one is quite simple and I was thinking– how cute would this be in pink, red + white or pink, red + gold for Valentines day!? Here we go…
You’ll need a dark polish, a light polish and a bright polish, a top coat and a dotting tool (or mechanical pencil as I taught you here!). Here are the links for the colors I used: GREY // WHITE // TURQUOISE
STEPS:
- Paint your fingers with alternating colors.
- On your darker color, use your dotting tool to make dots all around the edge with your light color.
- Now follow the same pattern and do another round of dots just inside of your last dots using your bright polish (see above). You can keep going with this pattern if you want. I just like it lining the outside but it’s up to you.
- Take your darker color and freehand this step. You basically want to follow the shape of your nail, just slightly smaller to allow the bright color to rim the edges. It can be a little hard to get the hang of but you’ll get it. I like to start with painting from the tip. Notice the angle of the brush in this photo.
- Now switch your brush around as you see in photo 5. You’ll connect the two in the middle. I didn’t use stickers or a guide because I think it’s best to just freehand it. Also, once this dries you can go back in with your bright color and touch up the edges so don’t worry too much anout making it perfect.
- Top coat time. The best thing about a topcoat is it makes everything kind of settle in smoother. The little mess ups I had seemed to disappear once I applied my generous topcoat. (Thank goodness)


