TRICKS OF THE TRADE: BEAUTY BASICS
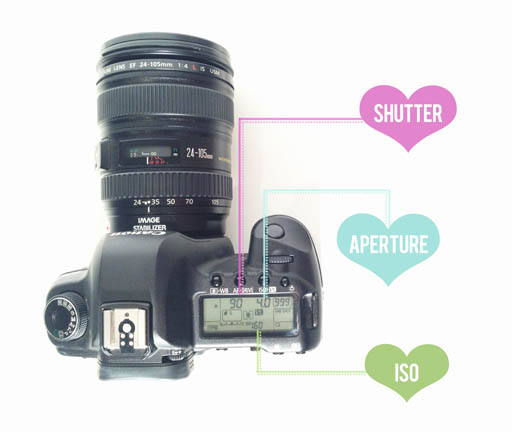
Let’s be real– taking your camera off of the auto setting can be super intimidating and down right scary if you’re not a pro. I’ll be the first to confess, I left my very first “big girl camera” on auto for years (and years). But now we’re livin’ in an incredibly image-rich, visually inspired society. Between Pinterest, Tumblr, Instagram + the infinite number of beautiful blogs on the interwebs you begin to want more control over your photos. I started to crave the ability to create my own images and wanted to push myself to learn what all those little buttons do. I saved up my pennies and invested in a Canon 5D shortly after we started TBD. I’m still no pro, but what I have learned has helped create most of the images you see on our site. I guess what I’m saying is, in order to turn your photos into something beyond basic, you’ll eventually have to take it off the trusty ol’ automatic setting. In the comment section of our last post with Canon, many of you mentioned that you’ve recently invested in a DSLR camera but are still learning how to use it. For the second half of our partnership with Canon, I thought it might be fun to share the 3 basic (and in my opinion, most important) things I learned when I started taking photos. A slightly different kind of tutorial than were used to but one that could help make things prettier just the same!
.
ONE
.
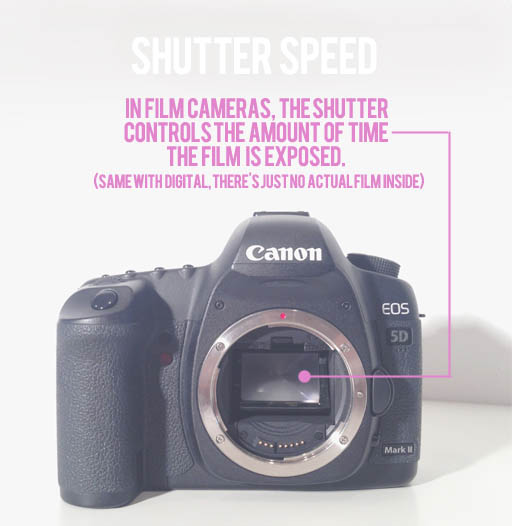
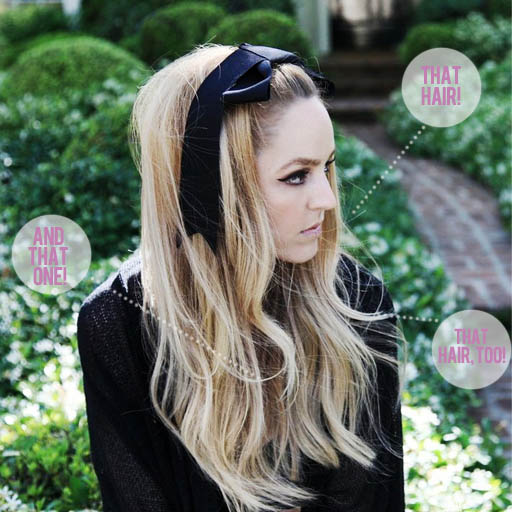
One photographer explained it to me like this– imagine a teeny tiny garage door that opens and closes really fast inside of your camera– that would be your shutter. If I want to photograph hair and really capture each individual hair as they fly around in the wind, you need to go as high as possible with your shutter speed. The lower the shutter setting with any kind of motion, the blurrier it could be. This could also change depending on other settings, but we’re simply covering the 3 basics! You can see in the photo below that I wanted to get this hair, that hair + every hair captured so I knew I had to keep my shutter speed high. I’m also a huge fan of having the sun behind you when photographing hair.
.
.
.
TWO
..
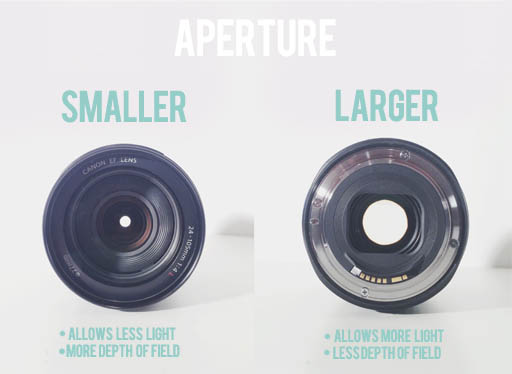
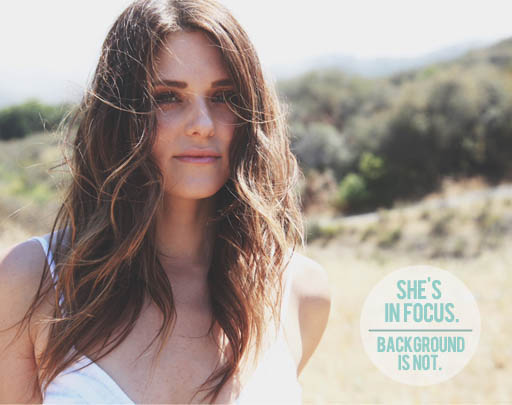
Took me a long time to understand aperture. Basically, there’s a little ring inside your camera (as you can see in the photos above). That ring is what lets the light in. If it’s small, you get less light coming in. If it’s open wide, you get more light coming in. The concept of that is pretty simple. But this also controls the depth of field of your photo. If we shoot a beauty photo outside, I want my model to be completely in focus with the background slightly out of focus so the empasis is on the girl and you’re not distracted by what’s going on behind here.
.
.
.
.
THREE
.
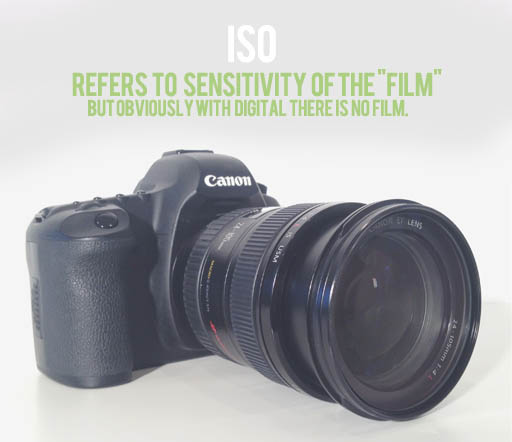
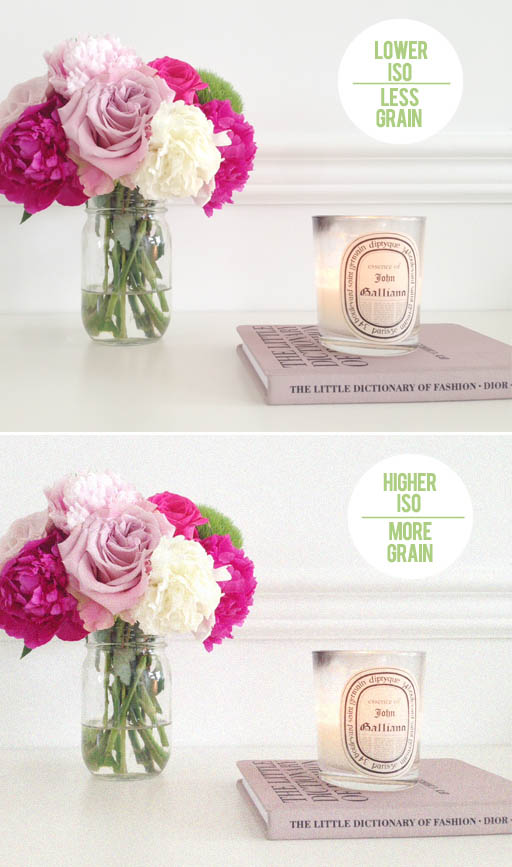
ISO ratings were originally intended for film. I remember when my parents would buy film when I was a kid. If it was for my brother’s sporting events, they would buy a high number like 1600 or 3200 because people were going to be moving fast. If we were going to visit some slow moving family members for a birthday or if someone wanted to take pictures of still objects, they would pick up a much lower number ISO film. Same goes for DSLR cameras. Raise the number when shooting something that moves quickly (like hair) or lower it when shooting makeup or nails inside. If you ever get a super grainy photo when you didn’t want that, it’s probably because your ISO is set too high for whatever you’re shooting.
.
.
Luckily, there are tons and tons of great photography video tutorials + workshops out there. You’ll learn to juggle all 3 of these settings at once with some practice. Besides, if you spend the money on a DSLR it’s worth it to push yourself to learn more about the guts of your camera, right? If you’re more advanced than some of us, we would absolutely love to hear any tips you might have below in the comments. But go easy! This one’s for the newbies!
.
If you still don’t feel comfortable taking your camera off the auto setting, tell us why! Maybe someone can answer a question you might have.
.
Thank you to Canon for this wonderful partnership. We’ve really enjoyed chatting with our readers about what’s behind the lens!
.
.
Took me a long time to understand aperture. Basically, there’s a little ring inside your camera (as you can see in the photos above). That ring is what lets the light in. If it’s small, you get less light coming in. If it’s open wide, you get more light coming in. The concept of that is pretty simple. But this also controls the depth of field of your photo. If we shoot a beauty photo outside, I want my model to be completely in focus with the background slightly out of focus so the empasis is on the girl and you’re not distracted by what’s going on behind here.
.
![]()


