hair
THE TEMPORARY TAPE EXTENSION MIRACLE
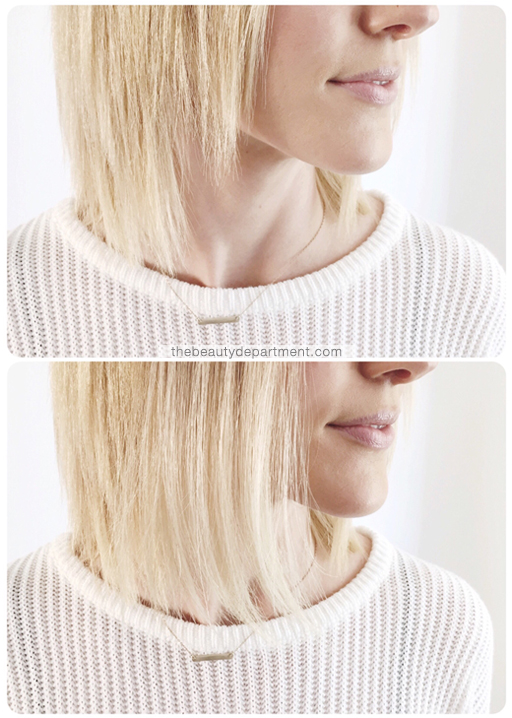
So, you lusted after Michelle Williams’ chicly-crafted pixie and raced to your hairdresser for the famous chop, perhaps a bit…prematurely? Then a few months into the awkward grow-out stage, you’re rocking an unbecoming shaggy mullet while she’s slaying an on-point, shoulder-length LOB?! Ladies, it’s not witchcraft: it’s tape extensions! They’re a powerful tool in the battle against out growing out a short, uneven and aggressively-layered haircut. Trust that I speak from experience: My own spontaneous pixie has had me playing the grow-out game for well over a year now, and that, in conjunction with a love for this bright blonde life, hasn’t exactly ushered me into a healthy, uniform length. Some days I need to fill in the gaps and some days (when wearing my hair up) I don’t! I love that they can be used in this temporary way vs. a real application by a pro which lasts many months. So, when I’m not doing THIS TREATMENT, THIS PRE-SHAMPOO FIX or BRAIDING it up to avoid heat damage, I’m reaching for the tape-ins to give me those full front corners that give a bob it’s coveted form. Here are the steps, if you find yourself longing for the same thing:
- TAPE-IN EXTENSIONS (rely on your hairdresser if you need to custom color or cut these)
- TAIL COMB FOR PARTING
- SECTIONING CLIPS
- FLAT IRON
- CURLING IRON
- TAPE-IN BOND REMOVER or if I’m in a pinch with no remover, this LEAVE IN SPRAY works well, too.
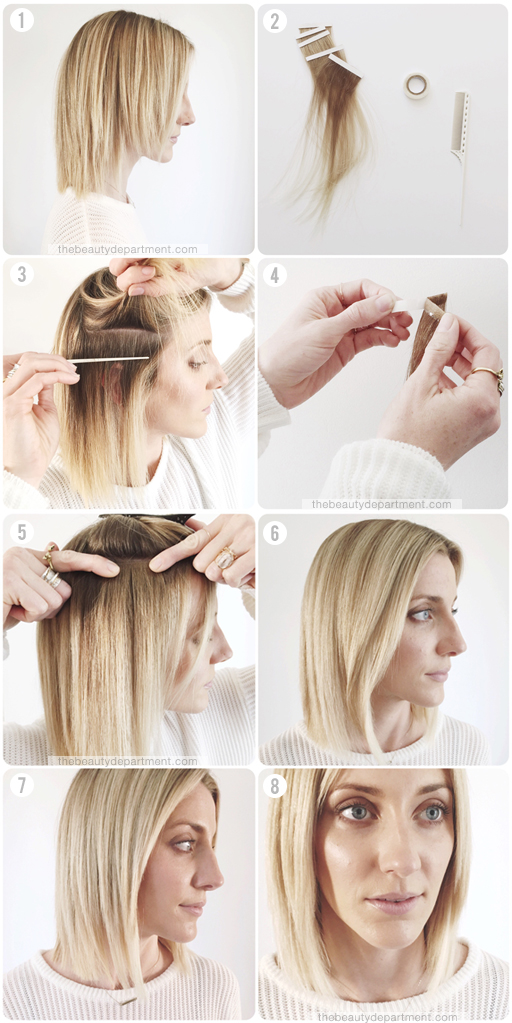
1) Start with clean, dry hair. Make sure to use a CLARIFYING SHAMPOO and only condition, if necessary, but NOT the root area! (Getting conditioner or any product near the scalp before applying tape extensions can cause them to slip.) Now blowdry smooth and flat iron to make sure there aren’t flyaways – when little individual rogue hairs get pulled by the tape it hurts! Also, waves can hide a multitude of sins, but straight hair will give you the true story of what’s going on with your cut.
**Note: know your limits: stick to the hair in the front sides of your head and avoid attempting the back. If your hair needs allover length or volume, or you’re looking for a more permanent solution, a trained professional should hook you up.
2) Have everything you’ll need ready to go once you start parting, and make sure to prep and tape all your extensions if you’re reusing them (instructions at the bottom).
3) Create a clean horizontal parting where you want to apply your extension, and clip surrounding hair out of the way. Try to avoid hairlines and your main part by about 1″. Make sure to hold the extension up first to ensure it’s the right length.
4) Remove the paper backing from the extension, holding just below the tape to avoid touching it. The transfer of oil from your fingertips will lessen its staying power.
5.) Apply right below your parting and press down firmly to smooth and adhere.
6.) Drop down clipped-up hair to gauge the difference. We decided the bang was still too heavy, so we added another extension at the top corner of the head – right before it starts to round into the top – to break it up.
7.) Once happy with one side, repeat previous steps on the other side and check for balance.
8.) The finished look. Dreamy. What a mini miracle! Remember to put your extensions in the same place each time or you’ll end up having to trim the tips to get it to look right, which then shortens the extensions!
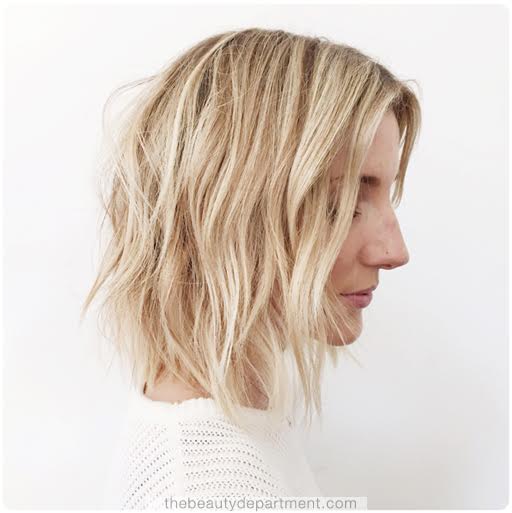
We completed the look with THESE waves to blend layers together and give the hair a little extra fullness.
This extension method will typically last until your next shampoo, or 1-3 days. If you use a different tape-in extension brand, also use their bond remover to make sure the process goes smoothly. As I mentioned above, if you’re in a pinch you can use a LEAVE-IN CONDITIONER. Spray directly onto the tape and gently lifting to remove. If you feel any tension, add more conditioner until they easily glide off. To prep extensions for future use, remove excess tape, wash well with clarifying shampoo and condition just the mids-ends, then let air dry. Once dry, apply the brand’s pre-cut double sided tape and leave the paper backing on until the next time you’re ready to get down.
You did it! This little trick can be a total lifesaver during the grow out process, and as you’ve seen, just a few pieces in the right place can make a huge difference. Now go make plans to be seen!
Have you tried tape-in extensions the non-permanent way? Let us know if they worked for your hair in the comments below!