makeup
GO PRO
TUTORIAL + PHOTOGRAPHY BY AMY NADINE, GRAPHIC DESIGN BY EUNICE CHUN
TUTORIAL + PHOTOGRAPHY BY AMY NADINE, GRAPHIC DESIGN BY EUNICE CHUN
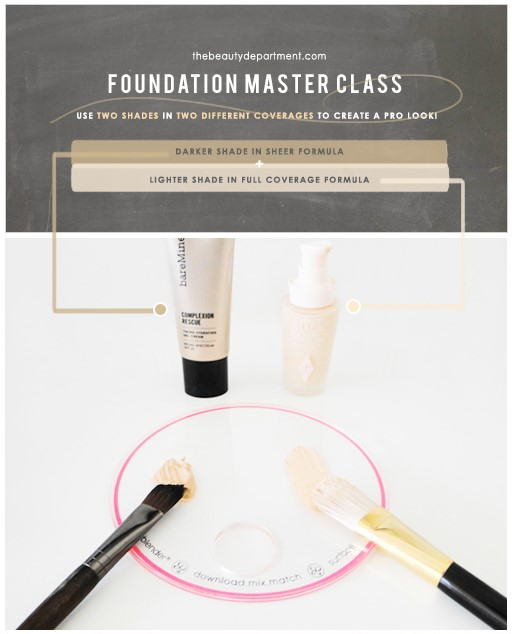
When we apply foundation, we’re making a blank canvas for whatever we want to express creatively that particular day. It’s always been one of my favorite parts of my day for sure. But when I work on my clients, I do this method. It adds dimension pre-contouring and highlighting. And honestly, you don’t need a full coverage foundation all over your face. It’s too much, too noticeable and unnecessary. You also won’t be totally happy with the coverage of a tinted moisturizer all over your face… it’s great for running errands but just not enough coverage for when you want to look your best. So this is what I do: apply a full coverage foundation in a shade one-half lighter than your actual shade in the center of your face, pulling it outwards in all directions. Then apply a sheer formula in a shade one-half darker than your actual shade along the perimeter and neck. Finally, blend it together with an egg-shaped sponge. The result will make you so happy! Here’s how:
TOOLS:
- A Sheer Formula in a Darker Shade for the Perimeter — this complexion rescue tinted hydrating gel cream($$) is my go-to lately.
- A Full Coverage in a Lighter Shade for the Center — I love this full coverage magic foundation ($$$) because it covers almost everything without looking cakey.
- Your Favorite Foundation Brush(es) — I used this small precision foundation brush ($$) for the perimeter and this big iconic foundation brush ($$$) for the center of the face.
- A Beautyblender ($$)
- An Artist Palette ($$) (optional)
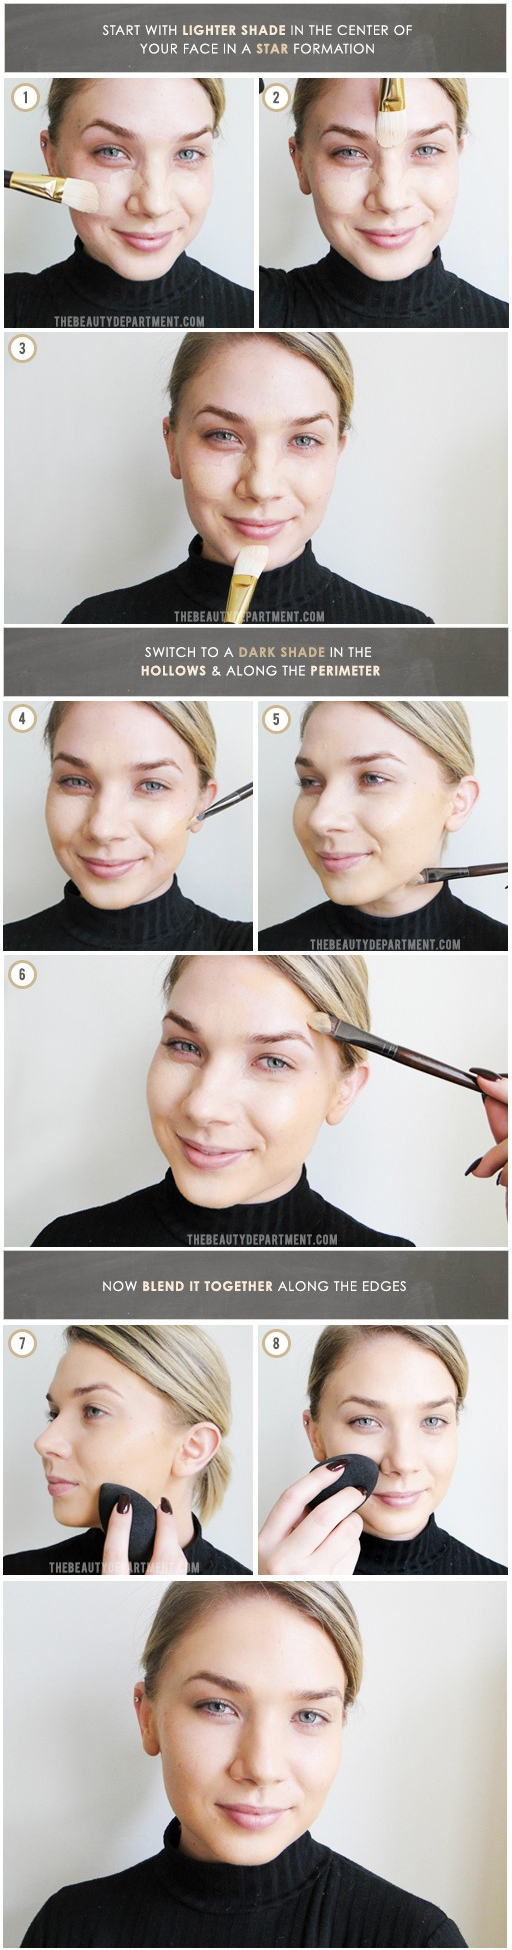
And that’s your canvas! It’s much more subtle than contouring and highlighting, but it definitely adds dimensions.