hair
THE UN-DONE BRAID

PHOTOS/POST: KRISTIN ESS

PHOTOS/POST: KRISTIN ESS
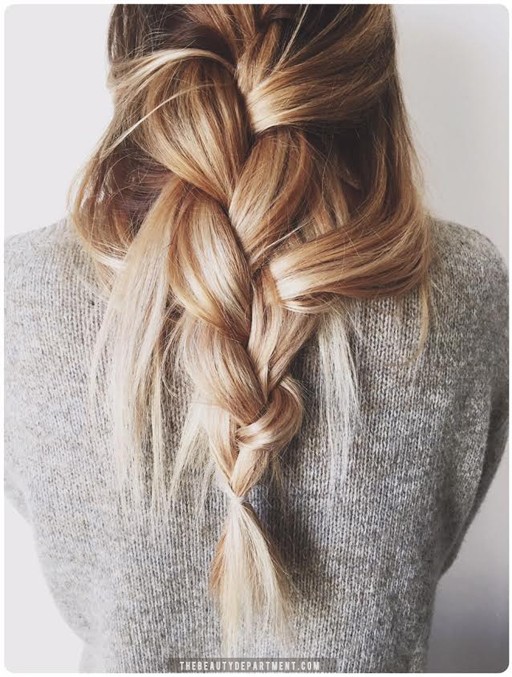
THIS is one of my favorite looks because you almost cant do it wrong. It’s a braid so haphazard that even someone with little to no skill could hook it up! This reminds me so much of those kids you see on a playground who have run around for so long that their braid starts to come apart. I often feel like as it falls apart it becomes more beautiful, kinda like me after an Adele song. Anyway. Here’s how we created this look…
Let’s not front. There are extensions in this hair. There are 4 thin tracks clipped in. Emily has fine hair and the extensions help to bulk it up. This looks best on longer hair but it can absolutely be done on medium lengths as well (you just need a little more patience and skill for that!)
If you have “slippery” soft hair, spray in a little OCEAN SPRITZ for grit. A light layer on dry hair will do! It’s the same one I mentioned in my last HAIR POST.
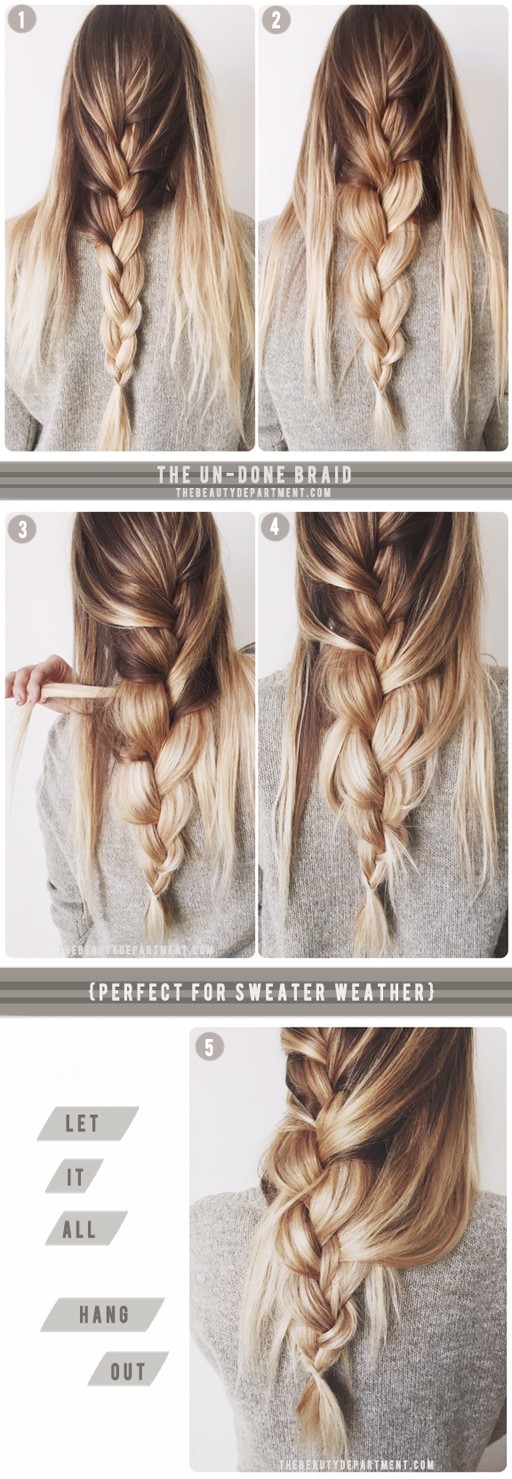
- Separate the center section and make a large french braid. In other words, take big pieces for your french braid rather than small. Leave out the sides from your ear to your front hairline.
- Split each side section into two pieces.
- You want to grab a piece and weave it through the main braid once or twice, leaving the ends out.
- Do that with all 4 side pieces.
- If any of them slip, you can use a tiny MICRO CLAW CLIP behind the braid to hold your section. Remember how we did that right HERE? Your pieces will stay put with those if you need them.
Again, the whole point of this is to feel very informal and un-done, so don’t overthink it and don’t make it too perfect. Add a light veil of strong holding hairspray at the end if you feel the need!
Do you guys like this kind of look? I have a few more of these types up my sleeve. Or is it just too messy for you? Would love to know your thoughts!


