hair
QUICK + EASY BRIDESMAID HAIR
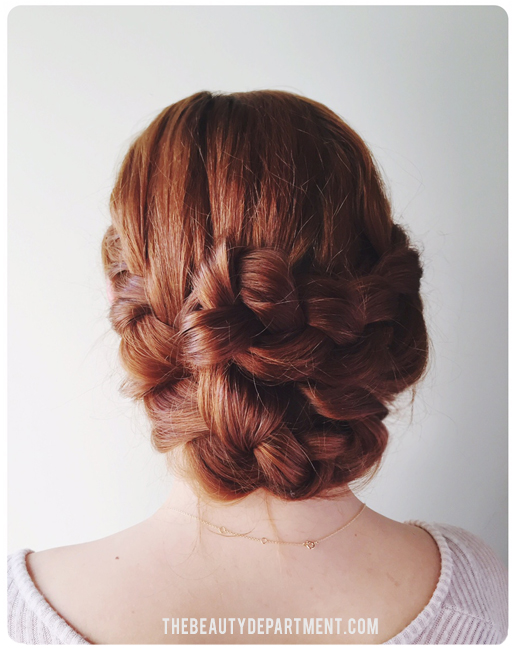
Wedding season is fast approaching and we want to make sure you’re prepared for bridesmaid battle! That means no struggles with your hair on the day of your friend’s big day. This is one of those tutorials you should bookmark, pin, save, frame, WHATEVER. Just keep it in your back pocket as a go to hairstyle for weddings, events and hot dates (eh hem– Valentine’s Day?). Here’s how to get this gorgeousness on your own hair.
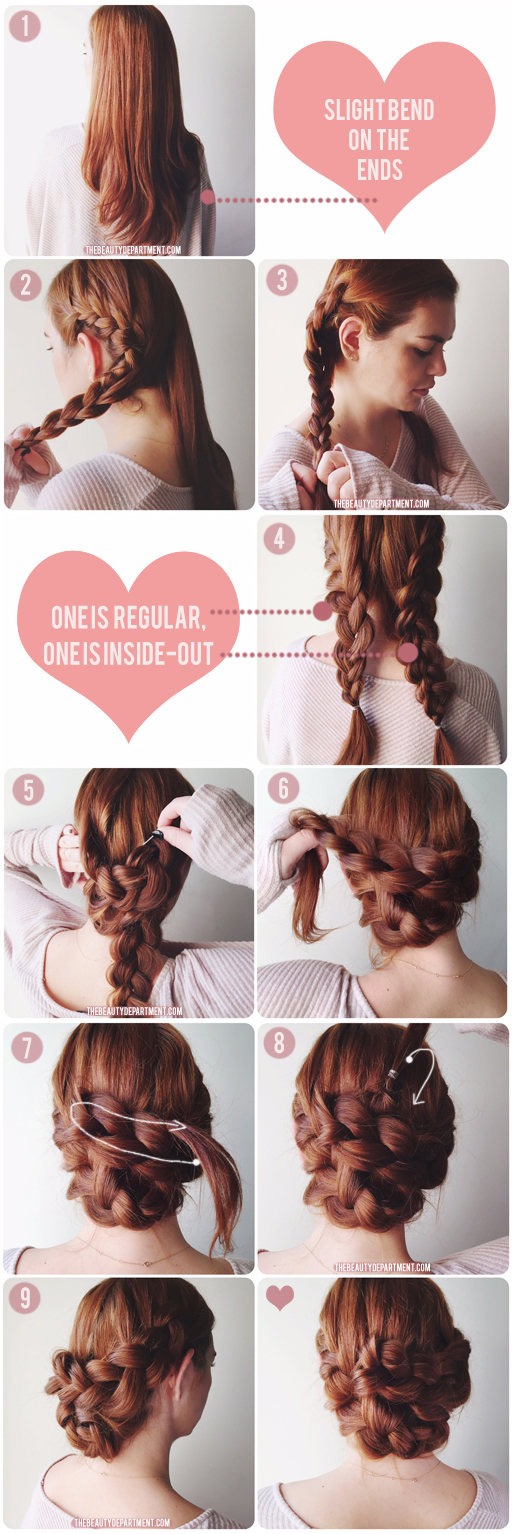
- Prep clean dry hair by giving it a little bend on the ends using a 1 1/4″ curling iron. The bend will help you tuck in the ends when you get toward the last steps. (In other words: you know how sometimes little straight pieces want to pop out? Curling them under helps!)
- Part the hair wherever you’d like it in the front. You can do middle or sides. For this, we went with the middle because it’s creates two even braids, but a small braid and a large braid could look very cute as well! Continue the part all the way down to the nape of the neck. Once the hair is divided, create your first braid. This one will be a regular french braid. Secure with a clear elastic.
- On the other side, you’re going to do an inside-out french braid which is the same thing– you just direct the pieces under instead of over as you braid. Secure with a clear elastic.
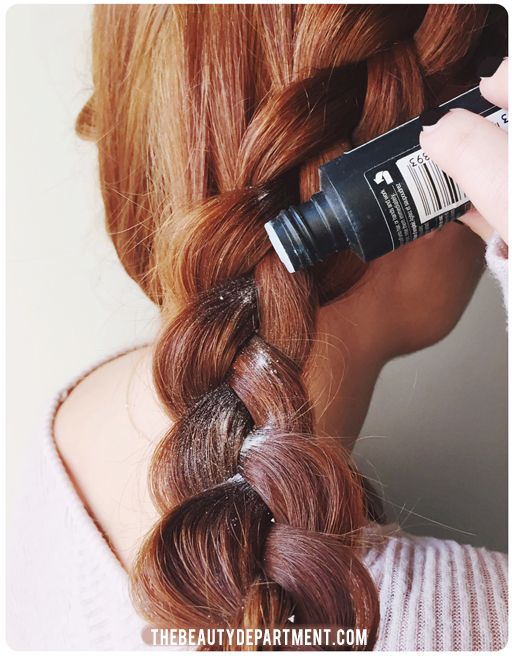
- Use a texture powder to fatten up your braids if you need them to be bigger! (SEE TEXTURE POWDER BELOW)
- Take your regular french braid piece from the left and cross it over to the right. Tuck the tail of your braid into the braid on the right and pin it using a large bobby pin. A lot of people will ask how this is done and the best thing I can say is, just tuck it in there and blend it. I usually feed the tail into the other braid until I find it’s in a comfortable spot. It shouldn’t be hard, especially if you’ve fattened up your braids first. The bulk of the braids will hide the tail well.
- Once you’ve pinned that, do the same to the other side. Cross it over, bend it under and pin it!
- Here we left the tail out so you can see which direction she folded the hair.
- Now simply tuck that piece down into the base of the braid, keeping it close to the scalp.
- Use a hand mirror to check your proportions from the back and sides. Use a light holding hairspray to tuck down any flyways if you need to!
TEXTURE POWDER: This is something I love because some of us have fine hair and want it to look MUCH thicker. The best part about texture powder is, it’s so easy. If you can sprinkle salt and pepper, you can do this. You just shake a little out onto your braid, then spread the braid out with your fingers. As you loosen it, the braid will stay together and bulk up instead of falling apart like it usually does when you do this without texture powder.
My two favorite texture powder must haves are THIS and THIS. There is very little difference between the two, so I just get whichever is in stock. Always good to have a back up favorite!
If you guys try this updo, we would love to see it! Tag us @thebeautydept on insta, kay!??!!


