makeup
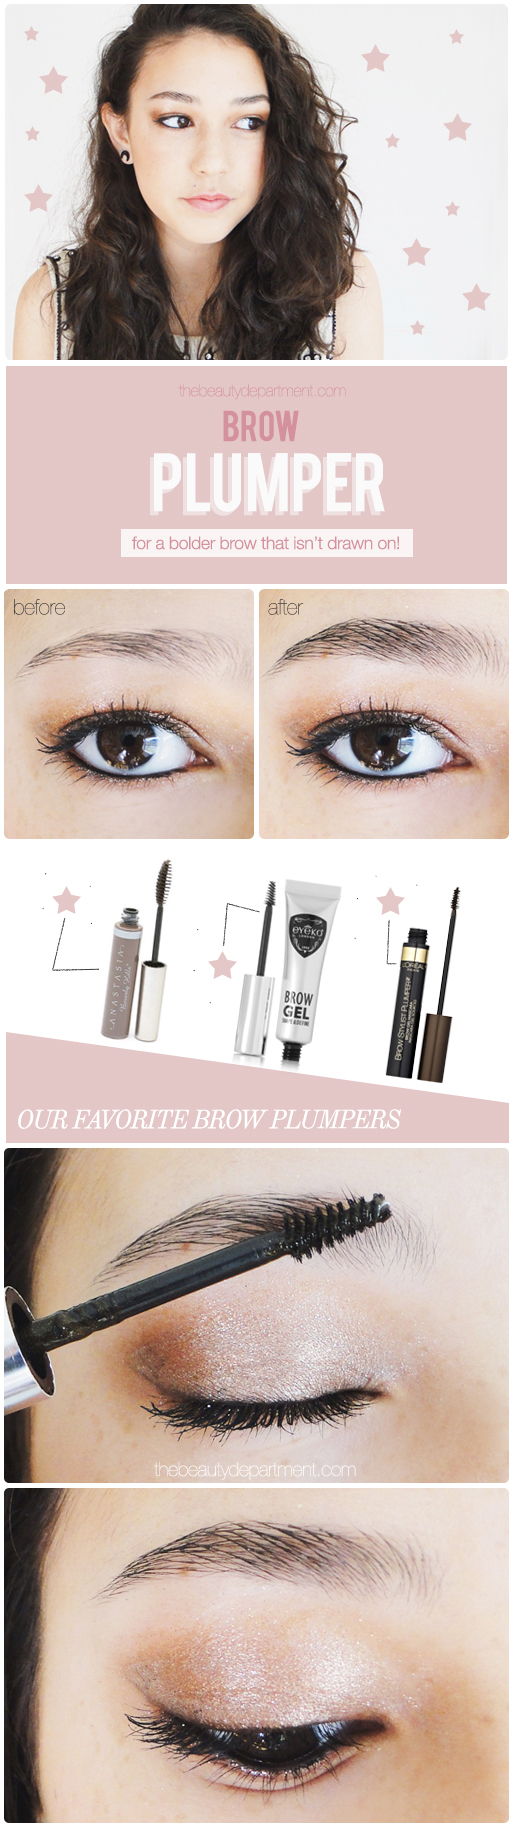
THE NATURAL BROW
Photos/Post: Amy Nadine, Graphic Design: Eunice Chun
Typically, we fill in our brows with shadow or we “draw” them on with a fine-point pencil. Today, we’re exploring another option available to us: a brow plumper! This technique accomplishes three things: first, it colors in the hairs darker, without touching the skin behind them. This makes them bolder and show up more while still looking natural, as if you had them dyed. Second, you’ll discover hairs you didn’t know were part of your brow, making them look bigger. Sometimes the wand finds little peach fuzz surrounding my brows, making it look like part of my brow and making it appear like I have bigger brows than I actually have! And third, it holds them in the shape that you brushed them. Here’s how:
TBD FAVORITE BROW PLUMPERS:
- Anastasia Beverly Hills Tinted Brow Gel
- Eyeko Tinted Brow Gel
- L’Oreal Brow Stylist Plumper Brow Mascara
STEPS:
- Start at the base of your brow and brush the hairs upward. Use a light touch so you do not hit the skin behind them.
- Continue brushing upward as you move across the brow then when you reach the arch, switch directions and brush the tail hairs over (not down or up, but more towards your ear).
For those inquiring minds that love knowing everything that we use in our tutorials, Chloe’s eye shadow is this gorgeous gold-copper one with this glittery shimmer wash on top!