hair
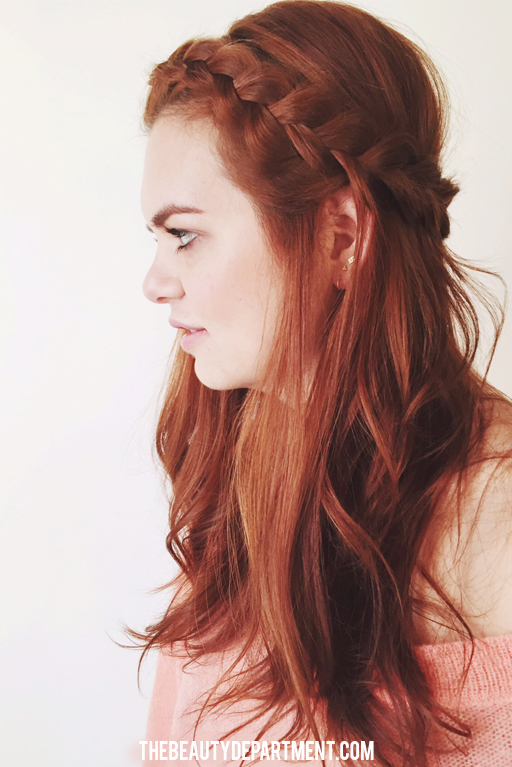
BRAIDED HALF UPDO
PHOTOS/POST/GRAPHIC DESIGN: KRISTIN ESS
PHOTOS/POST/GRAPHIC DESIGN: KRISTIN ESS
We love a braided half updo during the fall/winter months because it’s not only gorgeous with that big thick braid, but also leaving half your hair down keeps your necks warm! I think we can all agree this would look amazing any time of year, but today we’re pairing it with a sweater and turning it into our cold weather coiffure!

- Prep your hair by giving it some soft, loose waves. I’ve really been in love with the piece-y waves I’ve been getting from my NEW IRON. It’s a 1 1/4 barrel which is half ceramic and half metal. It was an serious hair investment but I’m feelin it! As you know, favorite budget friendly version of this iron is THIS ONE! I curled away from the face and put a couple drops of THIS GLOSS through the middle and ends, which smells ahhhhmazing.\
- Next up, create a hairline braid. You’ll want to do it inside-out because you’ll get a fatter looking braid. With a regular french braid, the bulk of the braid gets tucked underneath as you go, whereas an inside-out braid puts the bulkier part of the braid on top! If your hair tends to be really slippery and soft or if you just washed it, try adding a dab of BRAID PASTE or WATERBASED POMADE to the section before your braid. It will help you get a lot more control over your braid without making it sticky or greasy.
- Use THIS TRICK to fatten up your braid.
- Take a fine tooth comb and tease a very small section in the back of your head. Tease as close to the scalp as you can. This is where you’ll “anchor” your braid, so put it as high or low as you want it. I like to do it right at that bone you can feel in the back of your head, called the occipital bone. It’s a good safe place to anchor the braid if you’re not sure. Use a strong holding bobby pin (and a little strong holding hairspray if you need it) to anchor your first braid to your head.
- Repeat the same thing on the other side and then join them together in the back of your head, tucking the second braid into the first braid. Get them to blend together as best you can. I think of it like doing a half knot. I tuck the second braid up, over and then push it into the first braid.
- Use a hand mirror to check it from the sides and the back to make sure you have good balance!
Tip: go to a beauty supply and get the strongest bobby pins you can find. It makes the biggest difference with a hairstyle like this! A strong holding bobby pin will not slip and slide all over the place! You can typically feel the difference between the ones you buy at the drugstore and the ones you buy at a pro beauty supply. I love THESE ONES! This links to gold ones but you can get any color and they’re SO strong and fairly inexpensive. Get them, it will be worth it!