hair
DEBBY, DARLING!
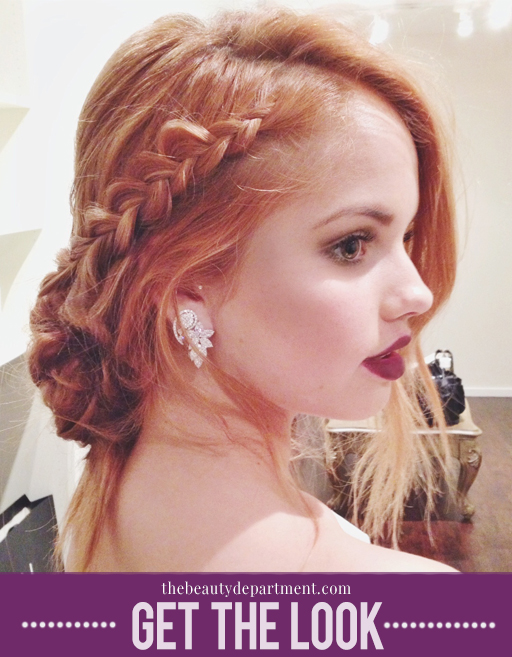
Last week I had the pleasure of working with one of my absolute favorite clients, Debby Ryan, before she was whisked off to the Elton John Oscar Party. Debby is so much fun and loves to play around with various looks. She was wearing a beautiful black + white gown by Lublu and her stylist put some major jewels on her ears, so we needed to come up with a look that would compliment both of those things. We both thought it would be fun to do something we haven’t done before. Something soft and romantic, but still a little bit edgy. (The real inspiration: I I got to listen to her new music from her upcoming album and really wanted to translate that vibe into her look.) Debby has lots of layers and this particular look works really well on hair that is super layered. Here’s how we did it…
- Create a deep side part using a tail comb.
- Do an inside out braid on the side with less hair. Stop behind the ear.
- Clip it temporarily with a small claw clip.
- I know this sounds crazy, but scrunch a little mousse into the middle and ends of dry hair.
- Take the blow dryer to it for a few seconds. The heat will soften up the mousse. The reason I do this is because I don’t want the bobby pins slipping but I also don’t want to douse it in hairspray. Heat-softened mousse still feels light and provides the extra hold.
- Separate the hair on the heavier side. Everything from in front of the ear stays out, everything else goes back.
- Roll all of the hair in back until it starts to coil into a bun shape. (Leave those front sections out.) Allow the hairs that fall out to stay out! You want it to be a bit disheveled!
- Pin as you go using large bobby pins.
- Once you’ve secured the bun, go back to the side braid. Gently pull it apart to mess it up a little. Pull out some of the pieces around your face to soften the look.
- Wrap the tail of the braid around the bun and pin it under.
- Give the heavier side a little bump or two with the flat iron, or you can do it with your curling iron if you’re not great with flat iron waves yet.
- Remove the excess weight on the heavier side. I like to take pieces from down near the ear and twist them back.
- Pin them into the bun. Continue to do so until you think you have the right amount left out.
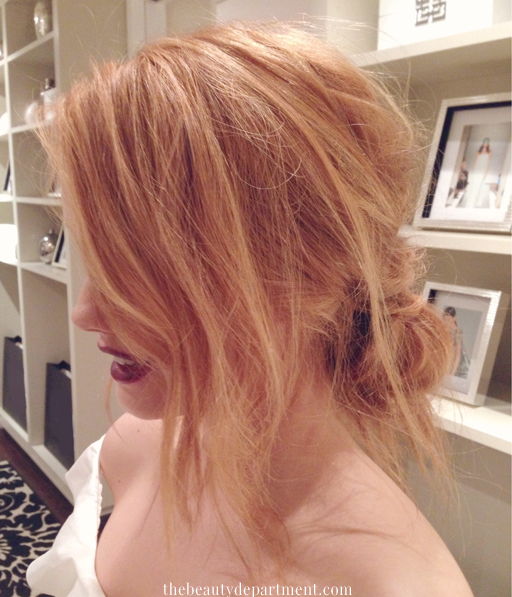
This is what it looks like from the other side. If you try this look, make sure to tag us (and tag Debby for that matter!) @thebeautydept and @whoisdebbyanyway. We would LOVE to see!


