nails
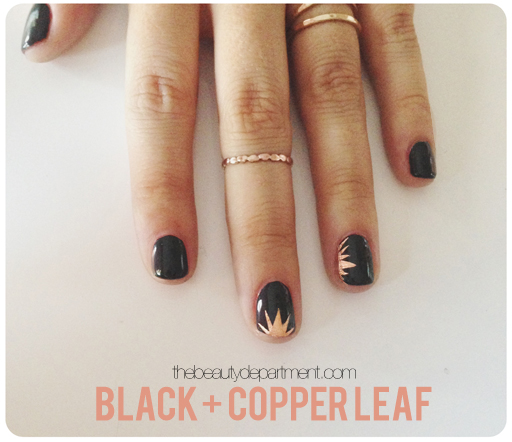
COPPER LEAF STARBURST MANI
What’s better than our gold leaf mani? A copper leaf mani! It actually looks like rose gold in person and gives off SO much shine. We had to find a way to incorporate it into nail art so this is what we dreamed up!
I’ve tried so many gold leafing brands and nothing is easier than this one from Blick art supplies. Try to get one that has a backing on it. If you’ve ever worked with gold or copper leafing, you know how much easier it is to work with one that you stick on then peel the backing off. Ok, here’s how it’s done… (**We should mention that we pre-gamed by painting the nails black and letting them dry for a while.)
- Cut a small square or rectangle from your gold leaf sheet. Fold the sheet in half to cut out a symmetric burst shape.
- I used nail scissors to cut the leafing because they’re tiny and help with accuracy.
- Once you have the shapes you want, paint a thin layer of clear coat on the nail you’re applying the leafing to.
- Once it’s about 50% dry, stick your star on. You can use tweezers for this or your fingers if you’re really careful.
- Let it dry a little more then peel the backing off to reveal a VERY shiny burst of copper.
- Do it on the next one. You can do this to as many nails as you want. Here I did two and changed the direction of the burst (which I recommend!)
- Once your starbursts are in place and the first coat of clear is dry, apply another layer of clear on top. I used this one from Walgreens which worked really well and didn’t mess with the leafing at all.
Show us your copper starbursts on Insta! @thebeautydept


