makeup
SEQUENCE OF STEPS

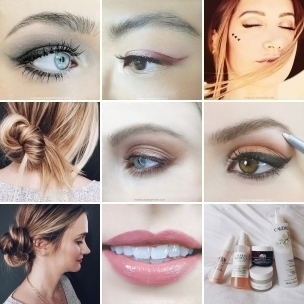
graphic design by eunice chun, post by amy nadine
graphic design by eunice chun, post by amy nadine
I get a lot of questions from readers and clients wondering if there’s a specific order in makeup application and I always reply that there are no rules or laws in artistry, but after ten years of doing it as a profession, I’ve learned there is a sequence that will make it easier for you. And that sequence changes from day to night as the looks are very different. Makeup is a balancing act and you should determine which features you want to play up and always do them first and step back often between steps to evaluate and walk the line of defining and accentuating vs. looking too “done.”
Additionally, I’ve listed which type of product (cream vs. powder for example) I prefer to use in the daytime vs. the nighttime because the lighting during day hours (sunlight outside or horrific artificial lighting in offices + classrooms) is less forgiving and makeup shouldn’t be “in your face” noticeable. While nighttime lighting is moodier and more forgiving, giving you the opportunity to be more dramatic with your makeup. Ok, here we go:
DAYTIME ORDER
- Tinted Moisturizer or BB Cream Apply this first with a dampened sponge for more natural coverage.
- Cream Blush Using your fingertips, dab the cream onto the apples of the cheek for a sweet flush that looks like your blushing. You do this before your eye makeup because often when you see how pretty a little blush makes you feel, you’ll realize you don’t need a lot of eye makeup or lip color.
- Tinted Lip Balm There used to only be a couple brands that had a couple shades of tinted lip balm. Now some brands have 30 shades in different finishes! They are so perfect for daytime because they add little or a lot of sheer color that looks effortless. You do this step before doing the eyes as well because if you choose a bright color, you might also determine that you don’t need a lot of eye makeup.
- Brow Pencil This step isn’t necessary for those of you blessed with perfectly arched, full brows; but for the rest of us, a little definition goes a long way.
- Cream Shadow With your finger, apply a taupe, pearl or light gold cream shadow as a single wash of color on your lid and crease for an approachable look.
- Kohl Eyeliner This step isn’t necessary unless you feel your eyes look more awake or less rounded with a quick sweep of liner. Just make sure to really hide it in between your lashes then smudge it with a q-tip.
- Soft Mascara There’s nothing attractive about stiff or clumpy lashes in the middle of the day. Finish the look with a soft and “pet-able” mascara. If you don’t have one, just make sure to first press the wand into a tissue to get rid of excess product.

graphic design by eunice chun, post by amy nadine
NIGHTTIME ORDER
- Brow Powder I start with this step because it really frames the eye and because using a powder can be more dramatic, it helps you determine how much eye shadow you need.
- Eye Shadow Nighttime is the best time for a smoky look, and eye shadow powder is more blendable than cream shadow, the key to pulling off a smoky eye. Do this step next because powder can be messy and you don’t want it dropping and smearing in your foundation.
- Longwear Eyeliner Choose a longwear or liquid liner at night to really define your eyes and make it last.
- Volumizing Mascara Build those lashes up, but comb through any clumps that will ruin the look. Now is the best time to sweep away any eye shadow or mascara droppings that might have fallen below your eyes with a baby wipe.
- Foundation + Concealer Nighttime is the only time that you can get away with a fuller coverage foundation, so if you love the look of a flawless complexion, go for it. Just make sure to color match exactly and include your neck.
- Powder Set the foundation with a loose or pressed powder to mattify and perfect the look. This will also make the bronzer and blush go on more evenly.
- Bronzing Powder Use it to contour your cheekbones, temple, along the hairline, your nose and jawline. A Kabuki-style blush will make it better for blending.
- Powder Blush Use it to add a touch of color to the cheeks. You apply this before lipstick because again, if you have a little color in your cheeks, you can see how nude or light you can get away with on your lips.
- Lipstick Because you’ve smoked out and played up your eyes, step back and determine how much color you need on your lips.
** The only exception to the nighttime order is if you want to rock a red or bright lip, then you should apply lipstick as Step 1, so you can balance everything else around it.