nails
MANI MONDAY
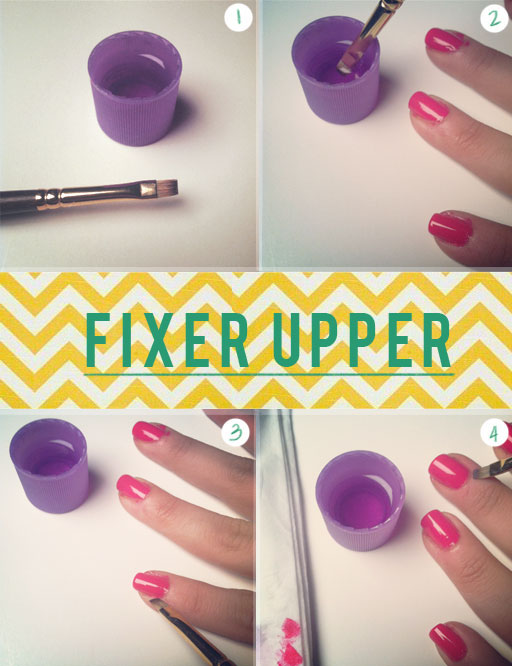
This Mani Monday is all about clean up! When you work hard to make your nails look beeeeautiful, you must go that extra mile. I’m sure a lot of you already do this, but we see plenty of photos from people who either don’t know or just don’t do it. And let me tell you, it makes a HUGE difference! Your nails look great, but it just doesn’t look as polished (ha!) without the finishing touches. Here’s how we recommend you perfect those pretty fingers:
TOOLS: A bottle of nail polish remover, a flat paint brush (or old eyeliner brush that you’re not going to use anymore), napkin.
- After you’re completely finished with your mani, pour a little nail polish remover into the bottle cap. Get a small, flat paint brush. You can get these from any art store and they should only cost about $1-2. If you have an old eyeliner brush that’s flat or angled, you can use that too!
- Dip the brush in the nail polish remover.
- Carefully go around the cuticle and clean up the excess nail polish.
- Wipe the brush on a napkin to remove the polish so you’re not spreading it around. Repeat on each finger.
After you’re finished, you should apply a little cuticle oil to keep your cuticles from feeling dry.


