nails
NAILED IT!
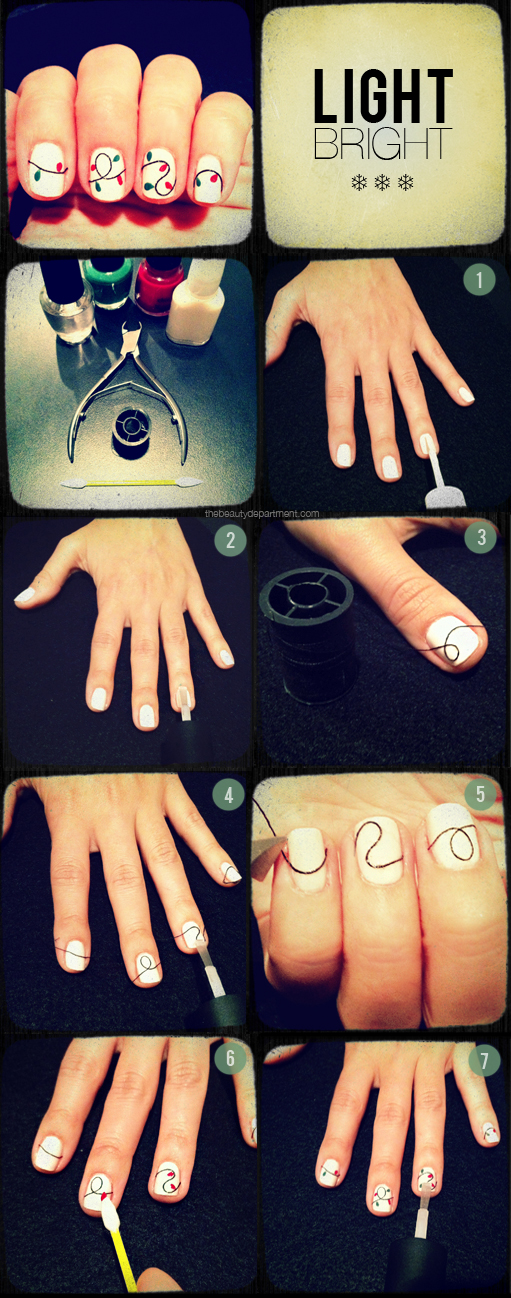
While you’re all probably busy decking the halls right now, perhaps you’ll be able to take a break to get fancy, festive + fun with this manicure tutorial from Lady Conrad! She wanted to string some lights across her nails and so she did… Literally! Here’s how she created these lil’ cuties:
TOOLS: base & top coat, green polish & red polish (you can use any colors you want), white or off-white polish, cuticle nippers or small scissors, black cotton string, a small brush or pointed q-tip.
STEPS:
- On clean nails, do a solid coat (or two thin coats) of white or off white polish.
- After the white polish dries, do one clear coat. The string will adhere to this so make sure it’s not too fast drying or too thin of a coat.
- Drape black string over the nail and let it loop as you see Lauren doing in the photo. Cut the string about 1/2 inch longer on each side of the nail. Don’t trim it down yet.
- Add a thin clear coat on top of the string to secure.
- Once that dries, trim the string down using cuticle nippers or small pointy scissors.
- Next is the fun part– adding your lights. Pick any colors you want!
- Last, do one coat of a quick drying clear polish.
XO


