makeup
WING IT, SISTER

- post design by amy nadine
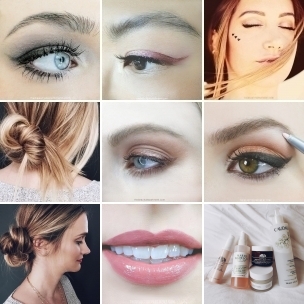
It’s official. On behalf of our girl culture, I think it’s safe to declare that we are all obsessed with the cat eye, most likely because of the way it elongates the eye and creates an illusion that they are farther apart. But did you know that this winged-liner look has three gorgeous step-sisters? It does and I’m happy to walk you through the steps behind each:
- WINGED LASHES: This look can be achieved in two ways, with individual lashes or a lash strip in a winged-shape cut into a third. You can find this strip style at a make-up specialty store, while the individual flare lashes can be found at your local drug store (buy “long” length, or “medium” if your own lashes are on the shorter side). Individual lashes (3 or 4 per eye): One at a time, add a pin-head drop of lash glue to the root of each lash, and place them individually next to each other along the outer corner of your lash line, but INSTEAD of placing each facing forward, place them more at an outward-diagonal direction for the winged effect. (Update: Our video tutorial with Lauren on applying individual lashes is almost finished being edited!) Lash strip: With a ruler or by eyeing it, cut the outer third section of the strip with cuticle scissors then trace along the root of the strip with a thin line of lash glue. Wait two minutes for the glue to get tacky and pop them directly on top of your lash line in the outer corner. **Tip: when applying mascara (always before applying false lashes), drag the mascara wand (thus dragging the lashes) from root to tip in an outward direction (instead of the typical upward direction) for more of a fluttery effect.
- SMOKED WING: This is a softer alternative and can be achieved with any shades (pewter/grey/black/bronze/copper/purple… you name it). Using the same blending techniques that you use when you create a typical smoky eye, start at the inner corner of your crease and sweep the shadow with a blending brush in a rainbow shape along the crease all the way to the area parallel to the end of your brow. Then in windshield-wiping motions, brush the shadow back and forth along the crease while moving in a downward direction along your lid until you reach the lash line. Repeating with another dip in the shadow but always beginning along the crease, sweeping back and forth as your move downwards towards your lashline. Tap off any excess product after each dip into the shadow so particles don’t drop onto your cheeks. Then trace the same shade along your lower lash line, out past your lash line to meet the shadow from your upper lid. **Tip: For a precise angle and winged line, you can first apply scotch tape at the angle from your outer lash line to the end of your brow, apply shadow as directed above, then peel off the tape. (Photo tutorial coming soon!)
- WINGED LID: You know I always have to throw in one for my makeup extremists out there! This look is best achieved with a long-wear gel liner (they come in small pots and almost every brand carries a version now) and a liner brush, because liquid liner isn’t meant to cover this much surface area and will most likely crack (not pretty). Start with a thin winged line along your lash line as if you were only doing a winged liner (watch Lauren perfect it in our Get Catty video tutorial here). Then make another line starting in the inner corner of your crease and tracing it along your crease in a rainbow shape, ending parallel to the end of your brow. Go back to the line along your lashes and extend the wing up to not only meet and connect with the crease line, but extend it a little further (this gives the wing a little “dip”). Then simply fill in the lid area in between the two lines. Hello Drama!!
XO Amy Nadine