hair
AT-HOME HIGHLIGHTS
PHOTOS + POST: KRISTIN ESS
PHOTOS + POST: KRISTIN ESS
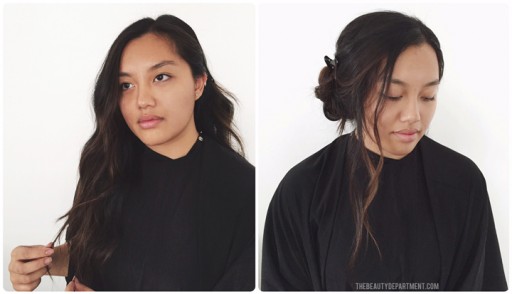
Last week, something fascinating happened; I learned that it IS possible for one to give themselves a mini highlight at home, both safely and beautifully. When I was about 14 I started highlighting all of my friends’ hair at home (oh yah… from a cap.) and somehow it always turned out great, so I suppose my initial confidence in this project sprouted from my experimental younger self mixed with my faith in Dana because she’s a smart girl. Now let me give you a little back story. I get asked about DIY highlights all the time and my reaction has always been the same: “JUST DO NOT.”, accompanied by a look that puts the fear of gawd into the person asking. But when Dana asked me if it was possible to add a little brightness around the front of her hair at home, as much as I wanted to put her on my schedule and offer to do it for her, something told me we should roll with this and turn this into a guide for those of you who really need it.
As a professional colorist, it used to be my NIGHTMARE to see people take bleach into their own hands at home. But in this day and age, I know people are going to do it anyway, so I figure if you’re audacious enough to try, the least I can do (as everyones digital big sister) is guide you through! All I ask is that you not try to do more than what’s easy and safe for you. I don’t recommend doing more than a little face frame highlight around the front because by doing more than that you could easily lose control and things could go very, very wrong. Okay… here we go.
To start, I’ll tell you the same thing I told Dana: please check all allergies (instructions to conduct an allergy test will be on the box), wear gloves, protective clothing and keep bleach off of your skin and away from your eyes throughout this process. Be an adult about this and don’t do things that are unsafe or unclear.
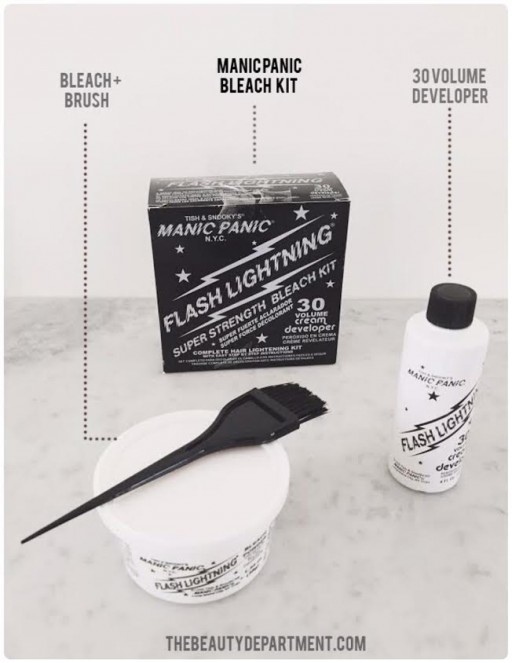
First things first, you will need a bleach kit. I wanted to be as realistic as possible about this so instead of going to the professional beauty supply stores I normally go to, I took Dana to Sally’s Beauty Supply in LA because I know the majority of you will have a Sally’s and you don’t need a license to shop there.
We got THIS EXACT BLEACH KIT for $10. If that sells out, it’s also available RIGHT HERE for a couple dollars more. I’m sure there are other great at-home bleach kits, but I wanted to make sure we got one that is widely available! (bonus: this kit also comes with a pair of latex gloves!)
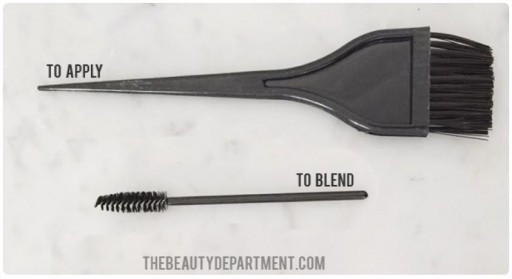
I think it’s important to have 2 brushes: one to apply the bleach and one to blend. Dana is going to use the application brush from the kit as well as a “spoolie” brush which is a small brush made for brows and lashes. It’s basically a disposable mascara wand. You can grab those at any beauty supply or if you don’t have that you can use an old toothbrush that you will then need to throw away.

Next steps are going to be grabbing your SECTIONING CLIPS, putting on your PROTECTIVE CAPE, and clipping one side of your hair back. I encouraged Dana to part her hair where she normally would (she chose a subtle side part), and then push everything back on one side so she could focus on one side at a time. (By the way, it is SO fun and entertaining to watch and guide someone through this process!!)
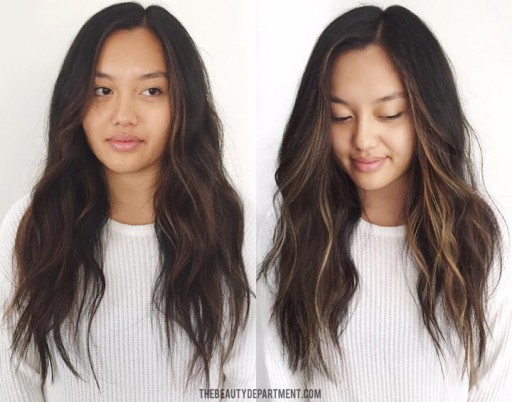
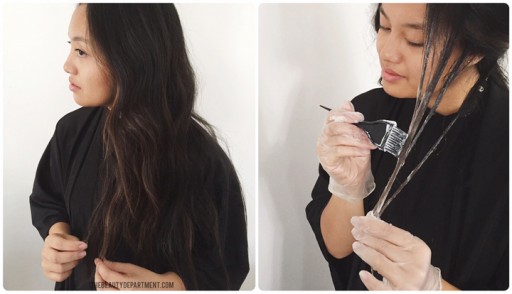
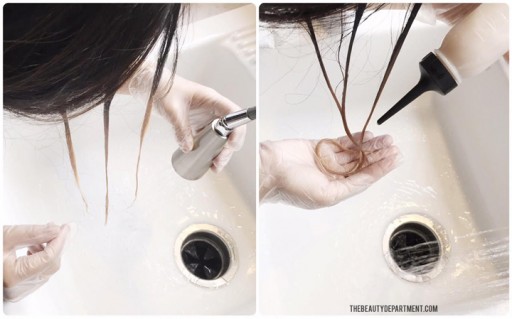
Now you have to find the exact pieces you want to highlight! I asked Dana to look at her hair and find the key pieces that she thought would look best highlighted when her hair is styled. OHHHH! I should mention– I also asked her to do this on styled hair so she could see where the lighter pieces should fall with the way she normally wears it. I think that is very important! In the right photo above you can see the pieces she chose. I think each piece you choose should be no bigger than a regular shoe lace.

Once you have your pieces out and the rest of your hair securely clipped out of the way, it’s time to mix your bleach! Follow every little tiny instruction on the box. I told Dana to mix half of the contents first and apply to one side, then go back and mix a fresh batch when she was ready to do the other side. Otherwise your bleach can oxidize and get weaker as it sits out.
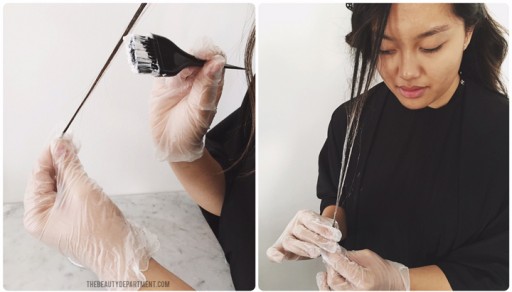
Time to applyyyyyy!! On the left you can see that she applied from the middle to ends. Do NOT even try to go higher than that, please. You’ll end up with problems. We want to keep this as easy and safe as possible, so pleeeeease don’t go up high with your bleach. Apply middle to ends on each thin section.
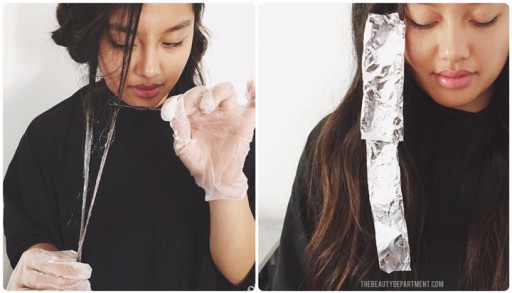
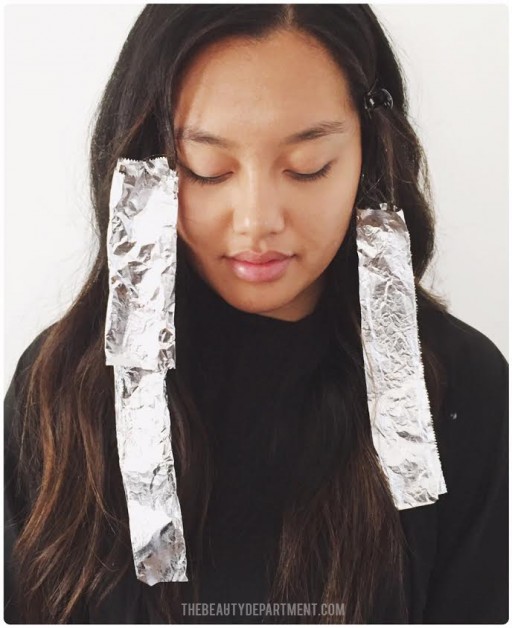
Once you apply with your applicator brush from middle down, use your spoolie to soften the transition between the dark and light hair. You don’t want a harsh line where the bleach stops so lightly drag your spoolie up and down where your bleach stops and soften the look! Once you feel like you’re in a good place with your blending, put the colored strands in either saran wrap or HAIR COLOR FOILS to keep the color from drying out. (ps: I had Dana put one extra foil above that one just to be safe and keep it away from her eyes on the side that’s heavier. She’ll only need one foil on the less heavy side.)
Keep in mind, bleach works very differently than hair color. Hair color stops, bleach does not. You will need to check your hair from time to time inside the foil/saran wrap to see how light it’s getting. Since this is a 30 volume bleach, it moves quickly and you should keep an eye on it. Don’t try to make the pieces platinum, use your best judgement and follow the instructions. You just want a subtle highlight.
Dana has very dark, very coarse, strong hair. I felt it was safe for her to section, mix more bleach and apply the second side while the first side was processing in the foil. But if you have dry, damaged hair, previously bleached hair or light hair naturally you should do one side at a time, start to finish because you may need to take side 1 off sooner than you think.
Keep an eye on both sides as they process. One will be lighter than the other as you go because you applied one side first. Do not apply heat when doing this at home. Things can get too out of control too quickly! Slow and steady definitely wins the race! In total Dana kept her foils on for 20 minutes per side but her hair is super dark and very strong. I would say the average is going to be 15 minutes give or take. Remember: Dana’s first side was put on 10 minutes before the other side so that time counts as processing time! In other words, her first side will be ready 1o minutes before the second side.
When the hair is ready, you’ll rinse, shampoo and tone. For this Dana shampooed with THIS, then applied THIS TONER, then THIS CONDITIONER. What tone you like is really based on your own personal taste. When you go into your beauty supply, talk to someone who works there about what tones you like and tell them you’re looking for a toner rather than a permanent color. Toner is like a sheer-colored top coat for the hair. It can cut out yellow, add warmth, add pink tones, whatever you want. So since I don’t know what you’re going for, it’s best to get advised by someone who works there. If you’re not sure what tones you love, check my tone guides here: ASHY, NEUTRAL, GOLD, WARM TONES, HINT OF RED, RED. With Dana, she wanted to make it more neutral so she used an ash toner. She applied it and left it on for 6 minutes and rinsed when it looked ready. Remember to keep the rest of your hair clipped back and away from all this color. Only apply the toner to those few pieces you’ve lightened, otherwise it can mess with your hair color and it can create extra unnecessary work for your salon colorist if you apply all over.
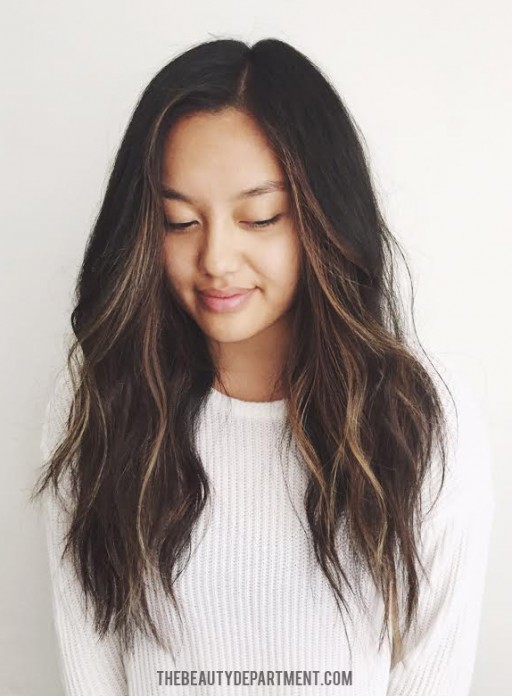
This was the final result once the hair was dried and waved. I think she did an EPIC job, especially for never coloring her hair own or anyone else’s hair ever before. She slayed the game and I was like a proud mom when all was said and done. Too bad she doesn’t want to do hair! Ha.
You may ask why this is neccessary. I think we all have very different lives and different priorites and before anyone slams the idea of me sharing this info with the general public, we need to remember that we’re not all the same. This world is big and we don’t all have access to a great colorist, not all of us have money to spend in the salon and frankly some just don’t have the time. But we have access to information by the click of a button and that’s what this is. That being said, would you have the courage to brighten a couple little strands at home?