makeup
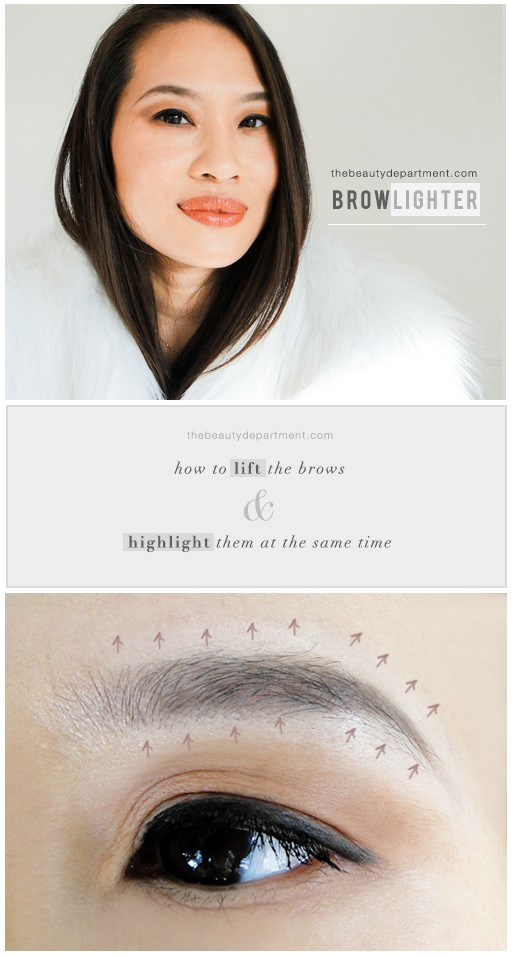
LIFT AND LIGHT
TUTORIAL + PHOTOGRAPHY BY AMY NADINE, GRAPHIC DESIGN BY EUNICE CHUN
TUTORIAL + PHOTOGRAPHY BY AMY NADINE, GRAPHIC DESIGN BY EUNICE CHUN
I love this trick because it accomplishes three beautiful things. First, the highlight above the brow creates the illusion that the brow is slightly raised. Second, the highlight below the brow creates the illusion that the lid is slightly raised. So both areas look “lifted”. And third, both actions draw attention to the brows, lighting them up with a halo effect. Genius! It’s subtle, as it should be, but worth taking a few seconds to do. Here’s how:
TOOLS:
- Your Favorite Concealer — In this case, choose a concealer that is a half shade lighter than your foundation. As always, I had my model Charlene use this iconic concealer ($$$) because it doesn’t move after you apply it. I also love this one ($$) and this one ($).
- A Concealer Brush — this favorite of mine is on sale for $11 from $29!
- Or Your Favorite Highlighting Pen — I also love highlighting pens to highlight the brows. Try this iconic one ($$$), this illuminating one ($$) or this one($).
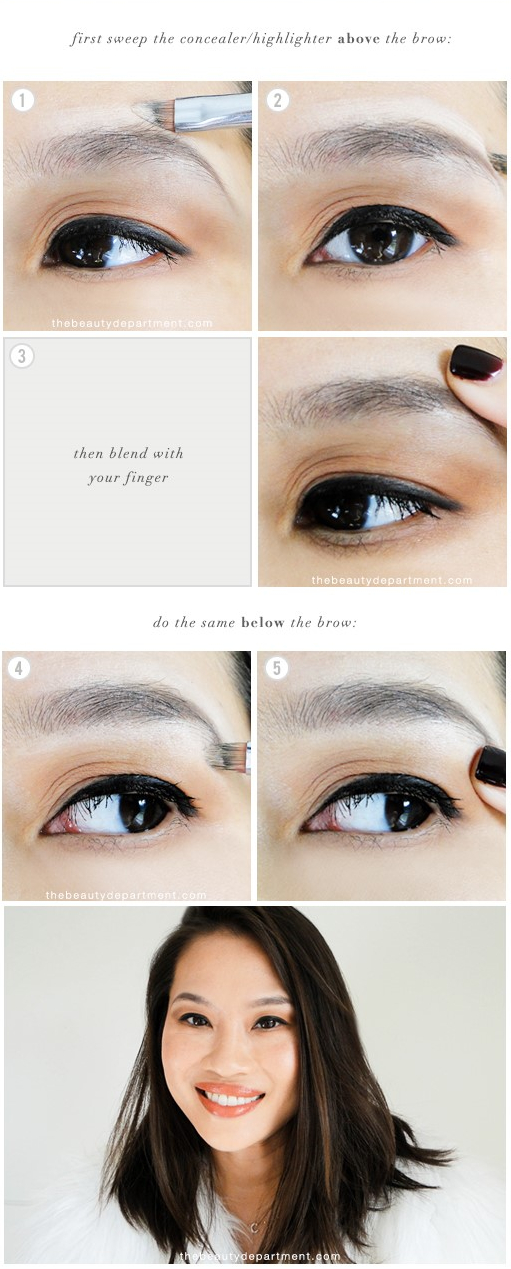
STEPS:
- After applying foundation all over your face, start just above the brow and sweep the brush from the distance of the beginning of the brow to the arch of the brow.
- Continue from above the arch of the brow to the end of the tail.
- Blend with your finger or a Beauty Blender.
- Do the same thing just underneath the brow, starting at the beginning of the brow to the end of the tail.
- Again, blend it in by tapping with your finger or a sponge.
For inquiring minds, Charlene is wearing BareMinerals Moxie Lipstick in Go the Distance and this Marc Jacobs #7 Style Eye-Con Eyeshadow Palette.