makeup
DIY CREAM BLUSH
TUTORIAL + PHOTOGRAPHY BY AMY NADINE, GRAPHIC DESIGN BY EUNICE CHUN
TUTORIAL + PHOTOGRAPHY BY AMY NADINE, GRAPHIC DESIGN BY EUNICE CHUN
I go back and forth between powder blush and cream blush all the time on my clients (and myself). But if I had to choose, I love the fresh-faced look that only a cream blush can give. Powder blush always looks well, like powder that sits on top of the skin. It’s super pretty, don’t get me wrong! But let’s be honest: no one will believe it’s an actual flush. You just look like you love wearing makeup, hence the term “looking made up”. Which is our divine right! But when you want to use makeup to strategically enhance, define, accentuate and look more awake, you have to use different techniques and different products. In this case, we want to mimic that “in love” glow, so we would switch to a cream blush and stipple into the skin. But if you don’t have one handy, convert your powder blush into one with today’s tutorial! Here’s how:
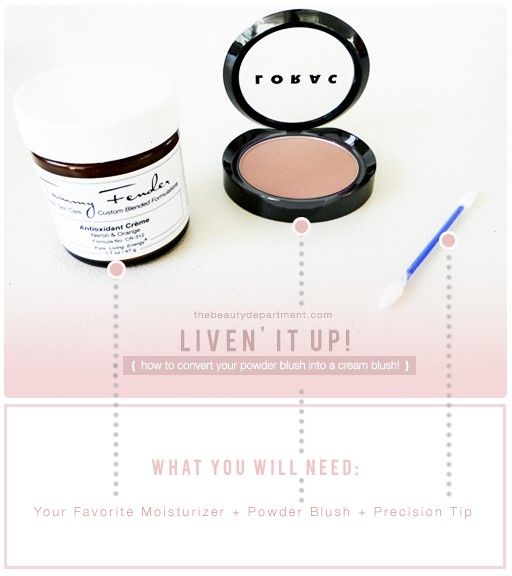
TOOLS:
- Your Favorite Powder Blush – This Lorac Buildable Blush ($$) in Prism has the perfect matte finish and is so pretty on almost all skin tones. For darker skin tones, try it in the Technicolor shade . I am also really into this budget-friendly blush ($) in Pink for cool undertones and Sunset for warm undertones.
- Your Favorite Moisturizer — Ever since I got my hands on Tammy Fender’s Antioxidant Creme ($$$) I can’t stop re-ordering it. It has completely changed my skin by plumping it up and making it happy again! I also love this active botanical cream ($) from your local drug store that a client introduced me too.
- A Q-Tip Precision Tip ($2.99) — I use them for everything… perfecting a liquid-lined cat eye or the perimeter of a red lip and of course, making a DIY cream blush!
- Your Favorite Blush Brush — Charlene used this artisan blush brush ($$) that will NEVER be replaced in my kit but if you’re not ready for the investment, I love this dual-ended contour and blush brush ($)!
STEPS:
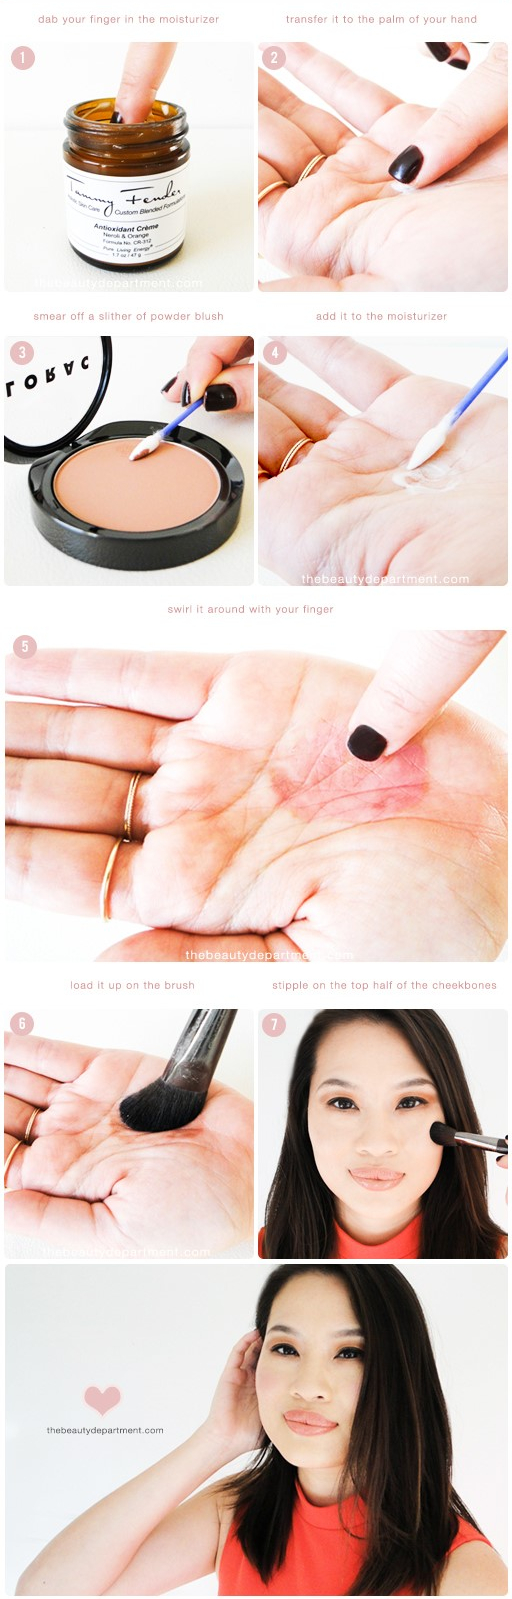
- Dip your finger into the moisturizer to grab a pea-sized amount.
- Swirl it in the palm of your hand. This thins it out and warms it up with your body’s temperature so it will melt together better.
- Slide the Q-tip across the powder blush with a little pressure to pick up a small amount of product.
- Now roll the Q-tip into the thinned-out cream in the palm of your hand.
- Swirl your magic solution around with your finger until it’s all mixed together.
- Dab the blush brush into the solution to load it up.
- Fake smile in the mirror to find the apples of the cheek and start on the top half as you stipple the brush from there along the top of your cheekbones. Some of my clients love to keep it concentrated on the apples only while others like to do a high corner flush, more towards the temples. Basically, if your face is very angular or bony, stick to the apples to add fullness. If your face is rounder or you’re a little heavier right now, suck in your cheekbones and concentrate the blush there (and follow the hollow with a bronzing powder to contour and thin them out!).