tutorials
LIGHTEN UP!
TUTORIAL + PHOTOGRAPHY BY AMY NADINE, GRAPHIC DESIGN BY EUNICE CHUN
TUTORIAL + PHOTOGRAPHY BY AMY NADINE, GRAPHIC DESIGN BY EUNICE CHUN
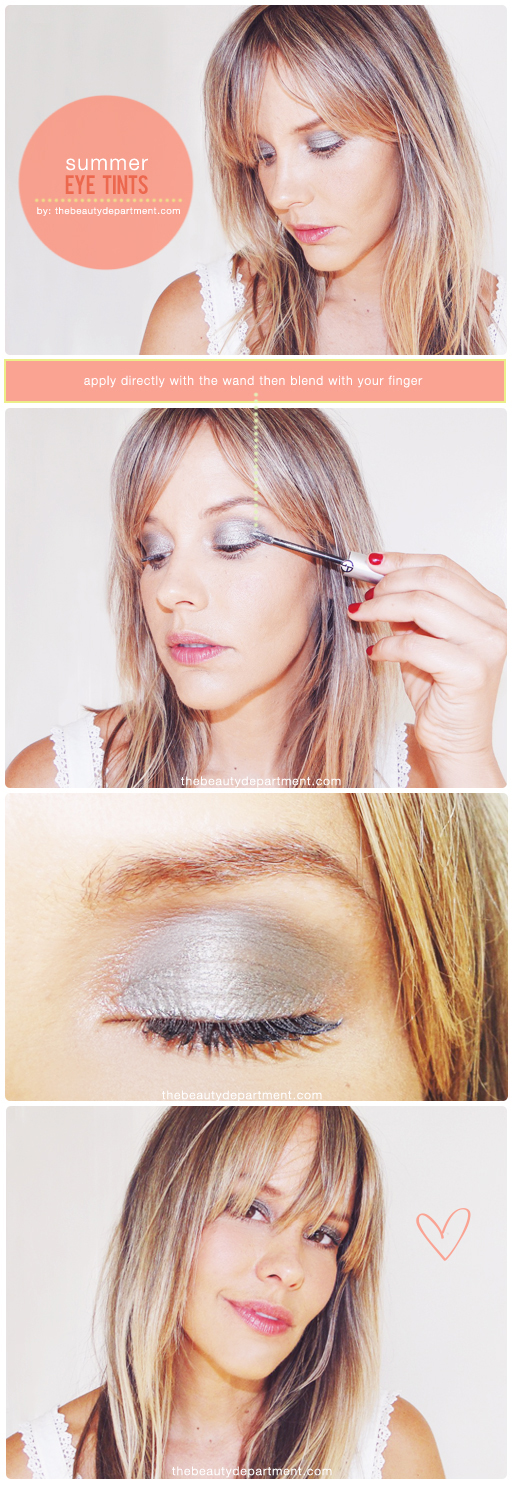
This Summer why not ditch the dark smoky eyes and try something different? Something that you’ll friends will notice is nothing you’ve ever done before. Something that is light but head-turning… a creamy metallic eye tint is just what you need! I’ve been obsessed with eye tints; using them on my clients and myself every chance I can. Because the formulas do. not. crease. Or feather. They stay where you put them and have way more intensity than a shadow could ever hope for. So here’s your chance to break out of your comfort zone and try something new. Here’s how:
FAVORITE EYE TINTS:
- I used this one ($$) in shade #5 Green Iron on Penelope above and have kind of been wearing it every day since I got my hands on it. Something gorgeous happens to it over time and it becomes really sparkly. Prepare yourself for tons of compliments.
- I also really love this one ($$$) because it comes with a cream tint and a shimmer to stamp on top, this one ($) that comes with a cream on one end and glitter on the other end and this one ($) which is just a beautiful cream shine shadow.
STEPS:
- Apply it directly with the wand if applicable or a brush if it’s in a pot or tube. I apply it as a color wash all over both the lid and the crease but you can just do the lid.
- Blend the crease portion with your finger. This is optional. Sometimes I do it, sometimes I don’t!
Pair it with mascara, cream blush and a lip stain or balm and you’re set for Summer! You can also line your eyes to bump it up for night, but if you’re going to do more than rim the inner waterline, just wait a couple minutes for the tint to dry. You can also add a copper eyeshadow “sunset” to the crease to make it more dramatic for nighttime. But I like to go lighter in the Summer. Regardless, have fun!