makeup
LET’S COMPARE!

TUTORIAL + PHOTOGRAPHY BY AMY NADINE, GRAPHIC DESIGN BY EUNICE CHUN
TUTORIAL + PHOTOGRAPHY BY AMY NADINE, GRAPHIC DESIGN BY EUNICE CHUN
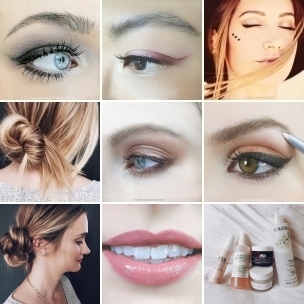
One of my favorite things to do is to pick a feature and compare the different ways that we can accentuate and define it. Today, let’s take the browbone; the area just underneath the brow. Daily, for the most part, I leave mine bare. Not because visually that’s my favorite look, but probably because these days I like to keep my morning routine fast and minimal. But if you watch me makeup my clients, I always either use a highlighter or a balm to add a little life to the area. It draws the attention to the brow, which has the important task of framing the eye. So let’s compare them and decide which one we like the best!
TOOLS:
- Your Favorite Highlighter: I love this one used on Chloe above ($$) and this one ($).
- Your Favorite Balm: Recently I discovered this one and have become obsessed with it! You could also use your favorite lip balm.
HIGHLIGHTER STEPS:
- Trace a line directly underneath the brow, starting at the very beginning and ending at the end of the tail. You can make the area under the tail a little thicker if you wish.
- Smear the line back and forth with your finger until it’s blended but not too much that it’s gone!
BALM STEPS:
- Either swipe your finger against a lip balm in its pot or squeeze a pinhead-sized amount of face gloss onto your finger and swipe it against the back of your hand to thin it out a little.
- Gently smear it along the browbone directly underneath the brow, concentrating it under the brow tail.
For those of you who like to know everything we use, this is the lid shadow in Grey Pearl and this is the crease shadow in Shimmer Copper, while this is the curling mascara used!