makeup
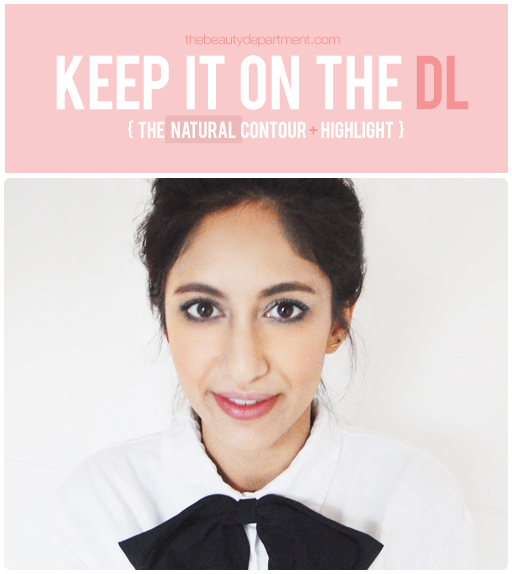
THE NATURAL CONTOUR & HIGHLIGHT
Post/Photos: Amy Nadine, Graphic Design: Eunice Chun
Post/Photos: Amy Nadine, Graphic Design: Eunice Chun
We’ve seen quite a lot of contouring and highlighting the last few years… some are nailing it, some are afraid to even attempt it and others are walking around looking, well, a little like fashion victims. I hate to say it! Especially because I think makeup is a creative expression and I hate when people call someone else’s makeup “wrong”. But there’s always room for improvement and constructive criticism (blend blend blend!) and this contouring and highlighting technique just might make all the difference in the world! Because when it comes to C&H, it’s better if people didn’t know you did it and it shouldn’t be read by the naked eye.

So try this: instead of doing it after you apply foundation (with cream or powder contouring & highlighting products), do it before with liquid or cream products!! Then apply foundation lightly over it and around it using a stippling motion with a dampened egg sponge. It gives a much more natural look and people won’t notice that you added the dimensions back in. Here’s how:
TOOLS:
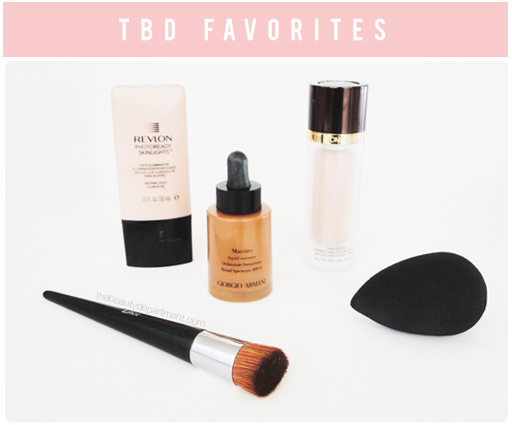
- Liquid or Cream Contouring Product — You can use a cream foundation that is a few shades darker than your foundation, a low-light sculpting cream or a cream bronzer or liquid bronzer that isn’t orange-y (like I did on Neelo above).
- Liquid or Cream Highlighting Product — I used this liquid highlighter but you can also try a highlighting cream.
- Liquid Foundation — this one will quickly become you new favorite!
- Egg-Shaped Sponge
- Flat-Headed Foundation Brush (on sale!)
- Kabuki Concealer Brush
STEPS:
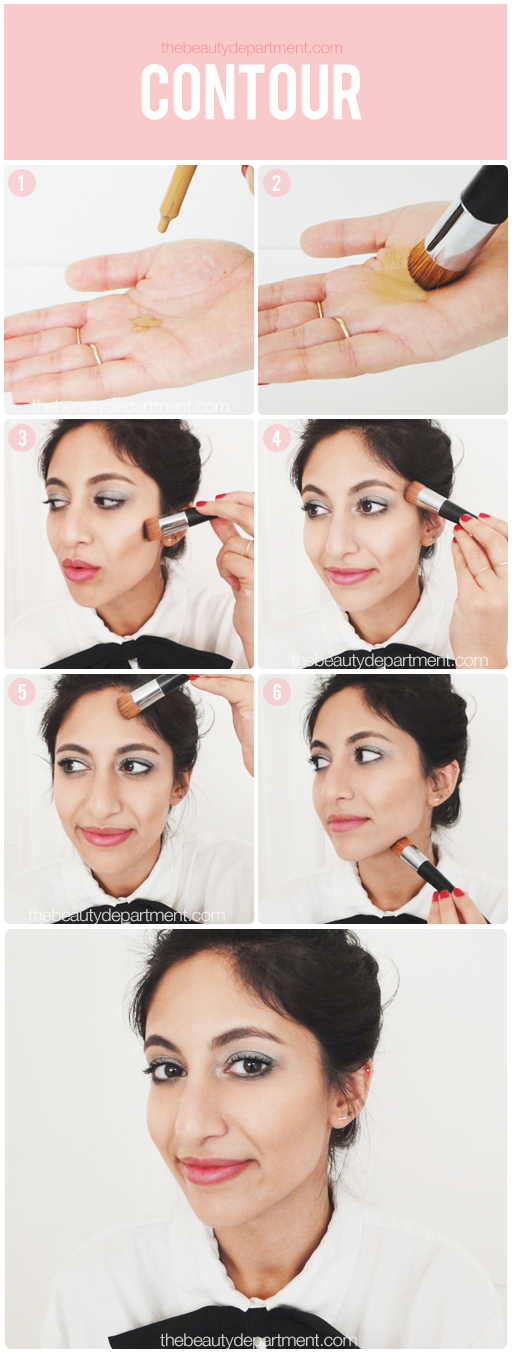
- After moisturizing your face, apply two drops of liquid bronzer onto the palm of your hand.
- Swirl the foundation brush into the bronzer to load it up.
- Look in the mirror and suck in your cheeks. Follow the hollow by pressing the brush repeatedly as you move along just under the cheekbone.
- Sweep the brush along the temple.
- Sweep the brush along the hairline.
- Sweep the brush just under the jawline.
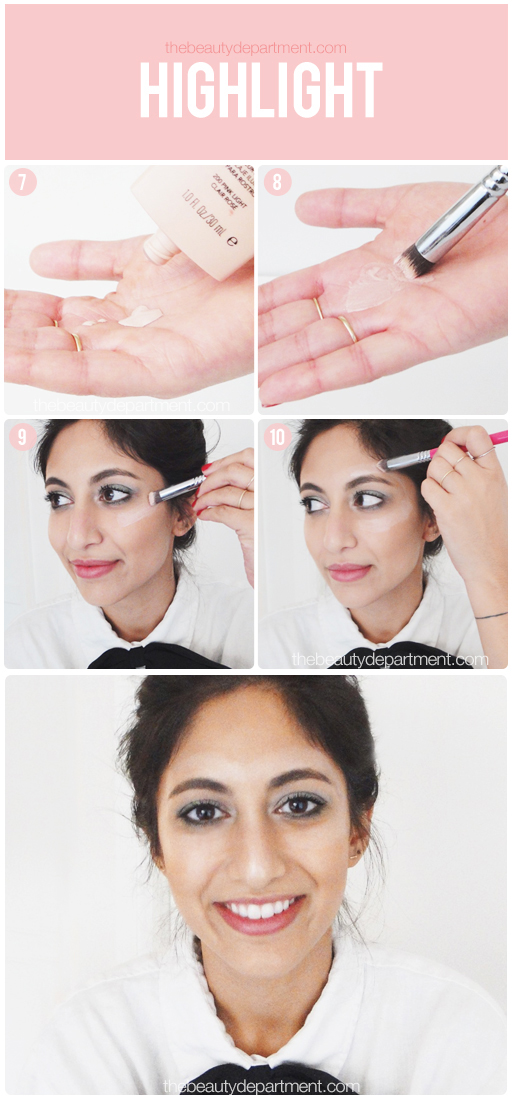
7. Squeeze a pea-sized amount of the liquid highlighter into the palm of your hand.
8. Load up the kabuki concealer brush by swirling it into the highlighter.
9. Sweep the brush along the under-eye area to draw the bottom half of an infinity sign.
10. Continue drawing the infinity sign above the brow as demonstrated above.
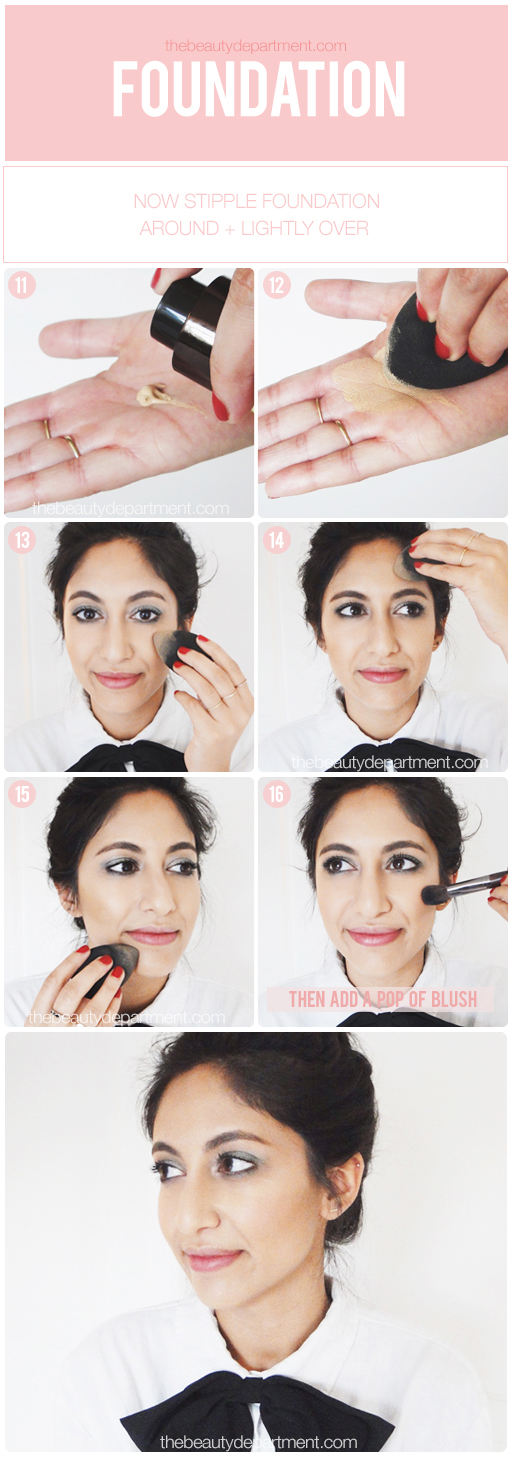
11. Pump a few drops of foundation into the palm of your hand.
12. Dip the egg-shaped sponge into the foundation a few times to load it up.
13. Lightly stipple (press repeatedly) the sponge along the perimeter of the highlighted and contoured cheek areas and gently over them.
14. Repeat on the forehead.
15. Repeat on the nose, chin and any other bare areas.
16. Finish with a pop of cream blush on the top half of the apple of the cheeks.
Set everything with powder and you’re good to go!