hair
KNOT TIE UPDO FOR SHORT HAIR
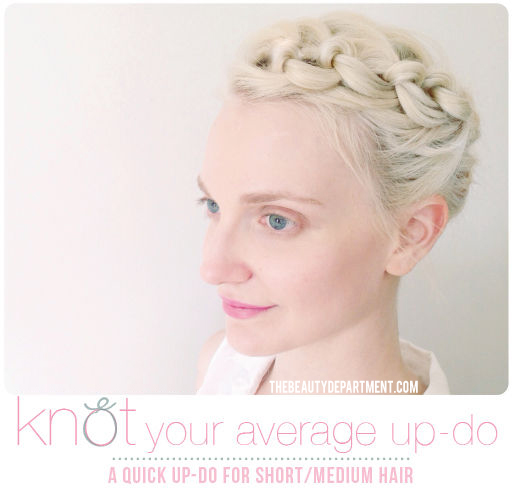
As we mentioned a few hair posts ago, we’ll be cranking out some short/medium bob-length hairstyles. This is one of my favorites if you’re wearing something with a collar and you want to “lift” the hair up off your neck. You can definitely wear it regardless of the neckline on your dress/top but if pulling your hair up is the focus, keep this trick in your back pocket! I’ve broken it down into 3 sections to try and make it less complicated.
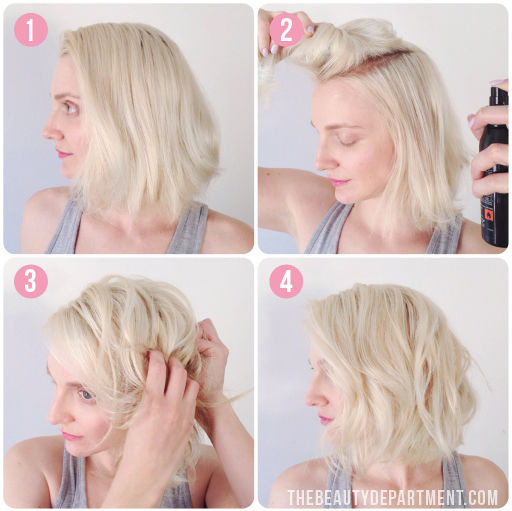
PART 1: Rough it up a little.
In these first four steps, you’re just adding some texture so the hair isn’t too soft. When short hair is super soft, the bobby pins will slip and the updo will slowly (or worse– quickly) fall apart. Here’s how we do that…
- Start with clean dry hair. If you have a little wave in your natural texture, let it be. It’s useful for this updo. If your hair is naturally pin-straight, you may want to add a little quick wave with a curling iron, wand or flat iron. If you hair is curly, leave it! This can totally be done on curly hair.
- Spray a bit of beach spray or texture spray all over, focusing on the root area. Make sure it’s not a product that feels too “crunchy” or sticky! You don’t want to have trouble pulling it apart as you put it up. It should be soft to the touch. Here we used THIS ONE from L’oreal, which worked really well and still felt soft.
- Use your fingers to build the hair up. Scrunch and massage the root until the spray dries.
- Twist some of the pieces to give it even a little more texture.
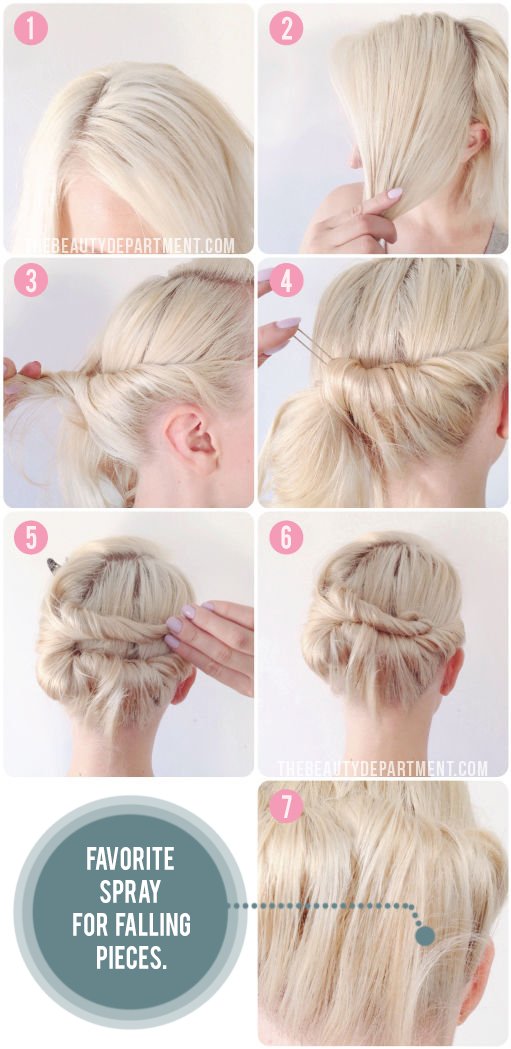
PART 2: Twist it up!
- Create a diagonal part. It’s good to do this so you get a slightly more even distribution of hair on each side.
- Section off the heavier side and clip it forward to save it for the “knot” portion.
- Now you’re going to start twisting the side with less hair. Start near the ear and work your way back and up!
- Keep twisting! Add some pins as you go to secure the twist.
- Once you’ve twisted it all you can twist, you’re going to need to tuck the ends.
- Loop it back around as you see in photo 6 and tuck the tail of your twist back into the lower part of the twist and pin.
- You’re probably always going to have some short hairs fall out of the back when putting up bob-length hair. For that I always keep some of THIS around. It’s like liquid glue (not in a bad way). It’s just a really strong and will secure those hairs that fall out, no problem.
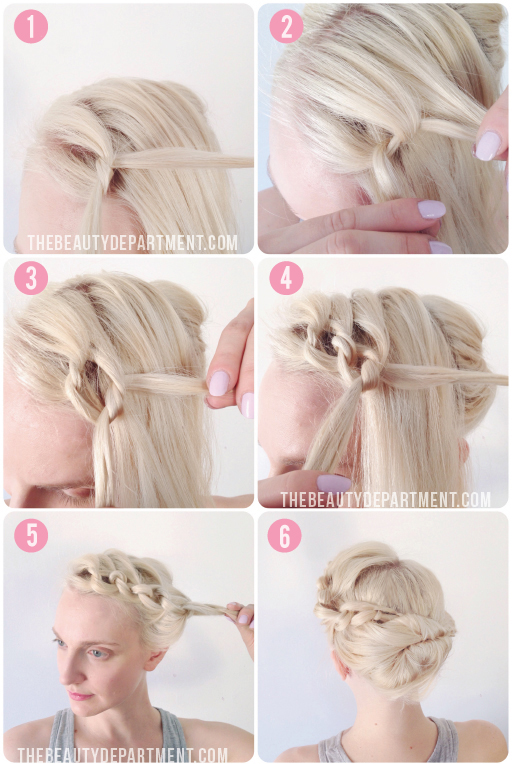
PART 3: Knotty, knotty!
- Now let’s go back to the front section. Pretend you’re going to do a french braid along your hairline. Instead of taking 3 pieces, take just two. Tie them together once.
- Now add a piece to each side, the same way you would with a french braid.
- Now tie that together!
- Keep going and adding hair to each section as you go.
- Once you get just above the ear, you can stop.
- Twist the ends and tuck it into the back twist. Secure it with a bobby pin and spray it with a light veil of hairspray.
Check it in the mirror from all sides. Loosen up some bits if you want to make it feel a bit more soft and natural. If you try it, we of course want to see it! Tag us in your photo @thebeautydept on Instagram!