nails
VALENTINE’S DAY: GOLD HEART NAILS
If you’re like us, then you know there are never enough ways to “put a heart on it” and obviously the month of February gets a little extra love. We’ve been playing with tons of different red and gold combos lately and we think we’ve found the perfect combo for a Valentine’s Day mani. Here we go…
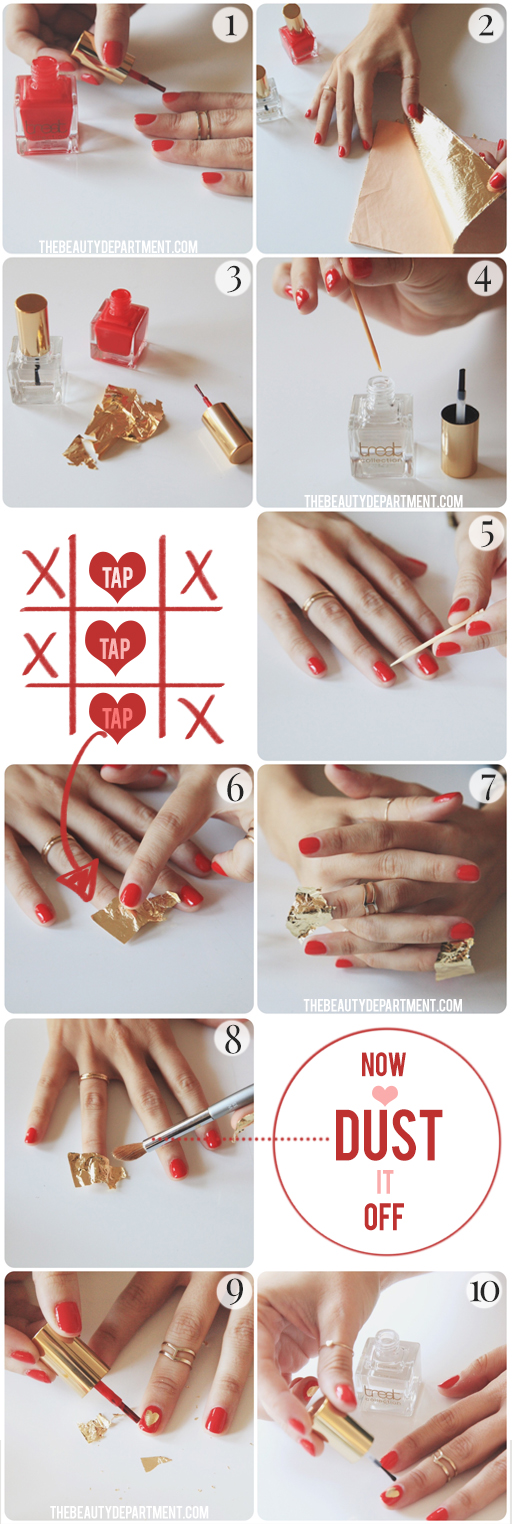
- We painted all nails with the perfect non-toxic super rich red — “Paris, Paris” by Treat Collection, (also available to our European readers here! Hooray!) You’ll want to wait a couple of hours in between painting your nails red & adding the gold leaf hearts so that the gold leaf sticks does not stick to the red polish. You’ll want it to stick to the clear polish in step 5.
- Once your color is completely dry, grab your book of gold leaf sheets and select a single sheet.
- Break the piece into smaller pieces, about the size of your finger.
- Get out a toothpick and dip it in your clear top coat. Here we used the clear top coat which is also from Treat Collection.
- Okay, remember our heart tutorial here? Use this method with the toothpick to make a clear heart on top of your nail. You can actually make any shape using this method (like lips or an “xo”), but we think a heart is easiest to start with. Make sure you’re in a well lit place so you can see the clear while you’re making your heart shape.
- Pick up a piece of gold leaf and lay it over the clear heart and tap it lightly a few times.
- Now wait for 10 minutes while the polish and gold leaf FULLY adhere together.
- Use an paint brush to dust off the excess gold leaf.
- Once you clear all the gold, the heart is what’s left! Use your “Paris, Paris” to perfect the edges of the gold heart if you feel like you need it.
- Add a clear coat to the top of each nail.
These nails are so gorgeous. The gold starts to chip away after a few days but we kind of love it because distressed gold leafing is still very pretty.


