makeup
A TRIO OF BROWS
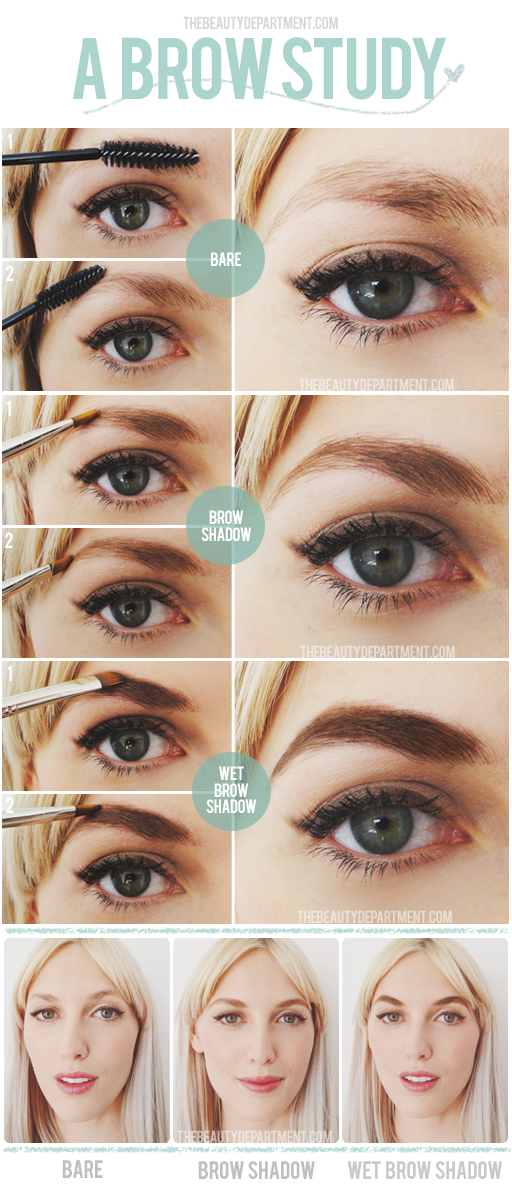
There’s only one thing that I love more than a side-by-side diagram. A side-by-side-by-side diagram! This way we can really single out one feature and study the difference between three different application techniques. Yes, I left out a brow pencil, one of the most popular brow products, but only because I’m saving it for my next brow study. Today we’re focusing on bare, brow shadow and wet brow shadow.
- BARE: This look is for those of us who like a soft and effortless look. Use a spooly brush or disposable mascara wand to follow the natural brow direction: 1. brush the base hairs upward and 2. brush the “tail” diagonally downward.
- BROW SHADOW: This look is for those of us who like to frame the eyes and define the brow. With a stiff, angled brow brush (my favorite is MAKE UP FOR EVER’s Angled Eyebrow Brush #270) and a brow powder (I love Laura Mercier’s Brow Powder Duo because you can dip the brush back and forth into both shades), draw individual brow hairs in upward motions as you work your way from the inside of the brow to the tail. For more comprehensive instructions, revisit my Brow 101 Tutorial.
- WET BROW SHADOW: This look is for those of us who like a really bold brow to make a statement. It’s also a great way to change the shape of the brow (see how I made Lacy’s more angular and pointed above). To do this, simply wet the same brow brush (revisit my Retro Brow Tutorial for more details), dip it into the brow shadow, draw the outline of the brow you want, then fill it in. You can also do this technique with a Brow Stencil.
Please take a second to take our poll!


