hair
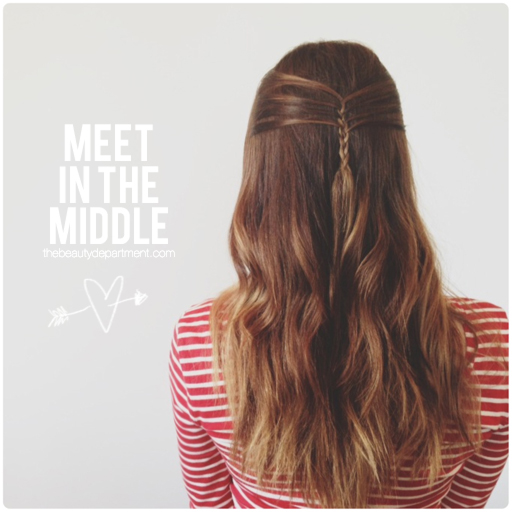
THE MINI FRENCH BRAID
Wait! Come back! Don’t be intimidated by this teeny tiny braid. It may look intricate and kind of difficult but if you can do a regular french braid, you can do this! It’s basically the same exact method as the french braid but you take tiny strands from around the face. We shot this in great detail, which is why there are so many steps, but it’s actually really easy and fast. Here we go…
You’ll need a comb, a mini clear elastic (optional), a curling iron or wand, and a mirror where you can see the back of your head.
- Separate a 1 or 1 1/2 inch section from the perimeter of your hairline, near your face. Do that on both sides.
- Take the remaining hair and throw it temporarily into a clear elastic to get it out of the way.
- Using your fingers, separate the hair just below any cowlicks you may have.
- Pull out a small strand of hair. This is going to be your “anchor” piece, which is going to be hidden but will be where everything joins together.
- Take a small strand from the left.
- Take a small strand from the right.
- With those 3 pieces, you start a classic french braid pattern.
- Take a new piece from the left and join it in.
- Take a new piece from the right and join that in.
- Continue braiding as if it were a classic french braid. I used 4 strands from each side, but you can do as many as you’d like.
- After you add in as many pieces as you want for the french braid part, finish it off with a regular braid.
- Now you have a choice– you can either tease the hair or add a tiny clear elastic to hold the braid in place. If you have fine hair, the teasing will probably work just fine. If your hair is med to coarse, you will probably want to use a clear elastic.
- Remove the original clear elastic that was holding the remainder of your hair.
- Your hair should look like this.
- If you want, take a curling iron or wand and put some wave into the ends. Here we used this wand by Tigi that I picked up at Ulta for about $30.


