tutorials
NAILED IT!
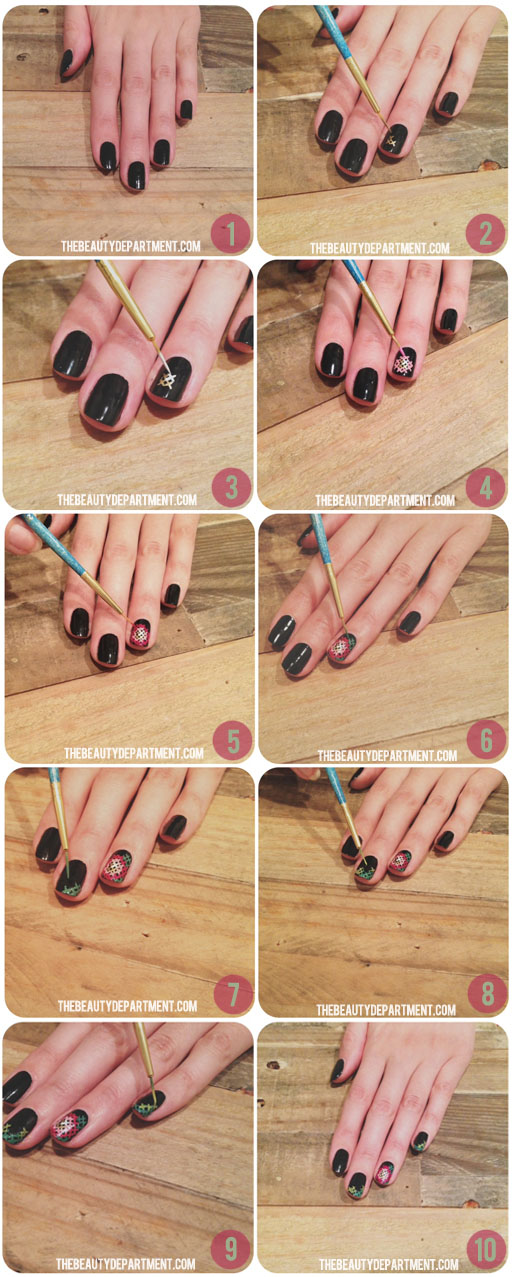
In a world where everything feels so new, I always like to take a step back, reach into my pocket of childhood memories and see if there’s something to bring back to the table. Who didn’t LOVE needlepoint as a kid? It’s classic folk art! In memory of an era when most things were handmade, I thought it could be fun to do needlepoint nails and I’m pretty obsessed with the way they turned out. If you have the patience and time, it’s a super cute mani…
Here’s the pattern I made. You can follow the same one or make up your own. Keep in mind, it doesn’t have to be perfect. Once you lay down a lot of little x’s, it tends to come together. To see the polish colors I used, click the links I’ve added in the steps below.
- Start with a base color. I chose black so that the colors would pop. White would also be a great fit for spring!
- Follow the pattern I illustrated above. Start with GOLD x’s.
- Next one WHITE x to help the center “pop” .
- LIGHT PINK for the inner petals.
- DARK PINK for the outer petals.
- DARK GREEN for the darker leaves.
- Next, you’ll carry the dark green petals over to the middle finger.
- Add some additional LIGHT/BRIGHT GREEN x’s for the lighter leaves.
- Same colors will be used on the pinky.
- Add a quick drying topcoat once your x’s have dried!


