makeup
A LOYAL FLUSH
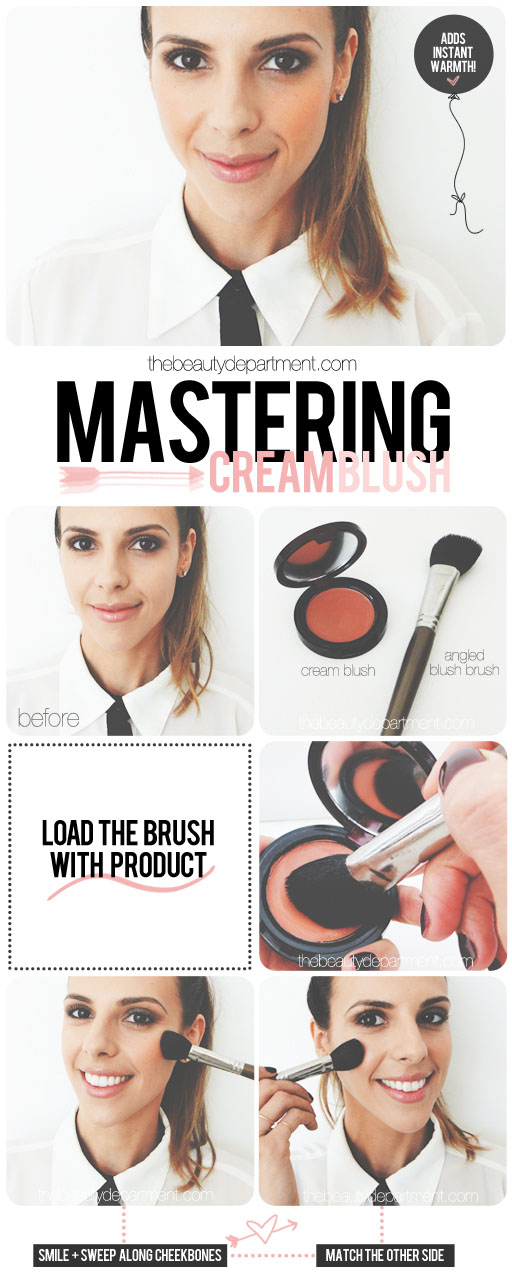
Today our Blush & Bronzing Series continues with the first of three blush forms (cream blush, powder blush and liquid blush). Cream blush is my personal favorite type of blush because:
- It melts into the skin nicely
- You can really control its placement
- It’s very blendable
- It looks the most natural
- It adds instant warmth.
TOOLS:
- Cream blush — my all-time favorites for at least the last five years are Kevyn Aucoin Creamy Moist Glow in Euphoria (above), TanSoleil and Pravella and Stila Convertible Colors.
- Natural-bristled Angled Blush Brush — we’re trained to believe that you should use natural bristles with powder products and synthethic bristles with cream products but I prefer natural bristles with cream blush because of the way it moves the products across the skin. And I love an angled brush because it gives you almost a flat surface to dip into the product and place flatly on your cheek.
- Your fingers — if you’re on the go and don’t have a blush brush, your fingers are great tools because they warm it up and give it an even better slip.
STEPS:
- Dip the brush into the compact by dragging the flathead across the top of the blush.
- Give it a quick sweep across the top of your hand to smooth it out.
- Look in the mirror and smile to find the apples of your cheeks. Then suck in your cheeks like a fish to see where the cheekbones pop out.
- Now that you know where yours are, start at the apples and using short quick strokes, sweep the brush along the cheekbones until your almost reach your temples.
- Repeat on the other cheek.
- Take a step away from the mirror to get perspective and turn side to side to make sure you’re even. Add more to one side if necessary.
- Take a step closer to the mirror to check your work and use your finger to blend any edges that are detectable.


