nails
NAILED IT!
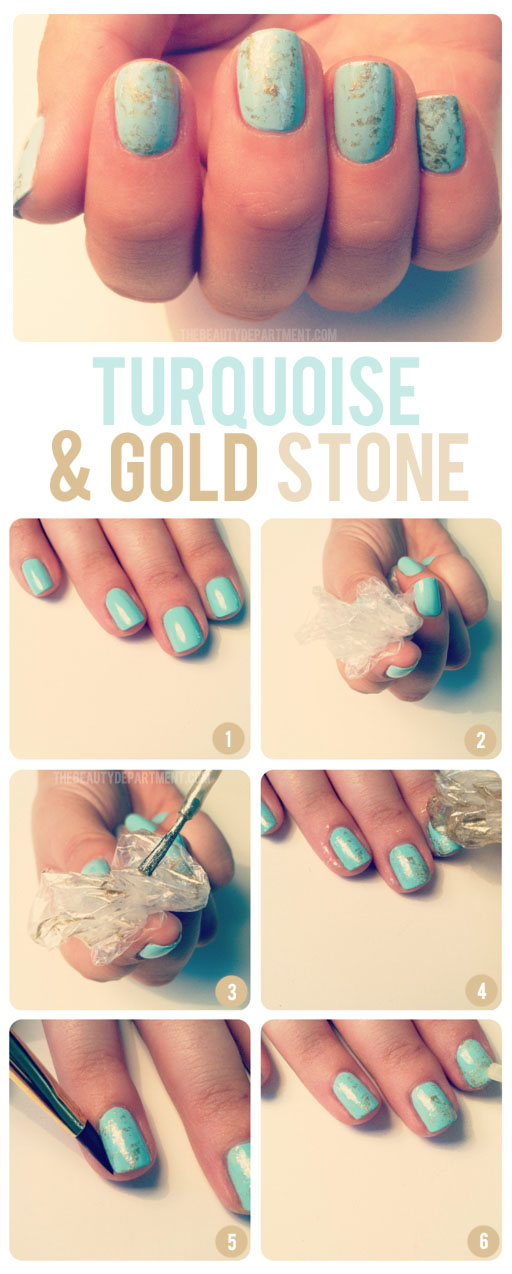
It seemed many of you were fans of the “Robin’s Egg” & “Gold Leaf” color combos, so we thought we’d do one more nail art combining turquoise with gold. In this tutorial we’ll teach you how to make your nails look like turquoise stones, but instead of using black as the accent color (which would make it quite literal) we’re using gold for a slightly softer and more glamorous look. Here are the 6 simple steps:
- Start by painting your base with a nice shade of turquoise. We used this one.
- Next, take a small plastic sandwich bag or plastic wrapper and crinkle it up. Hold most of it of it in your palm and make a “flower-y” shape with the rest as you see in the photo above. You’ll use this like a stamp.
- Paint some of your gold polish (we love this one) on the plastic. Doesn’t matter how you paint it on or where.
- Note: Dab the plastic bag/wrap on a piece of paper once or twice before you start to remove the excess polish. Now dab it on your finger. Then do the next finger. You’ll need to re-apply gold polish to the plastic bag every couple fingers.
- After you finish dabbing the gold on each finger, clean up the edges with nail polish remover and a paint brush.
- Add our favorite quick drying clear coat and you’re all set!
Show us your version on twitter. You can honestly do this in any color combination you want. Can’t wait to see which colors you choose.


