makeup
ASIAN BEAUTY FOCUS: EYES

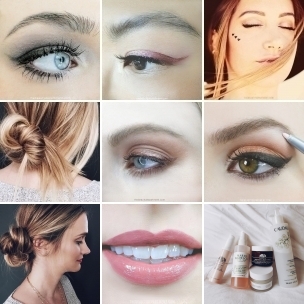
photo: justin coit, post by amy nadine
photo: justin coit, post by amy nadine
I believe that Asian women are among the most stunning in the world. We get so many emails from you and from those whose eyelids aren’t visible when they’re open (my client Rachel Bilson for example), asking how to make their eyes look bigger and I always first express my deep envy! Growing up, I was obsessed with supermodel Tatjana Patitz specifically because her monolids made her look so mysteriously alluring, enough so that she graced the cover of Vogue 39 times! There are a few tricks to accentuate this gorgeous eye shape and we’re lucky enough to have our lovely Jamie Chung back to demonstrate the techniques.
TOOLS
Concealer/highlighter + sponge/foundation Brush
Brow liner or brow shadow + hard-edged slanted brow brush
Light shadow (wheat or taupe), medium shadow (graphite or dark grey), warm shadow (espresso or dark brown) + lid, crease and blending brushes
Long-wearing gel liner pot (black or dark brown) + liner brush
Thickening mascara (black)
STEPS
**Before you begin, don’t forget your brows! Defining the brow adds strength and expands the entire eye area. With a hard-edged slanted brow brush, fill in the brows in the hairs’ natural direction with a dark brown shadow, while cheating more of a pronounced arch. Refer back to Lauren’s Brow 101 for the perfect brow. A brow pencil works just as well too.
1. Apply a concealer/highlighter that’s a half-shade lighter than your foundation with a sponge or foundation brush under your eyes and above your brows. For a quick refresher, revisit our Lighten Up post.
2. With a lid brush, sweep the light shadow over your entire eye area, starting back and forth along your lashline, continuing upward across your lid and crease then along your brow bone (just under your brows).
3. With the same lay-down lid brush, “pat” the medium shadow from your lash line to 3/4’s up the lid, patting the shadow in rows as you sweep it across your entire lid and crease.
4. With a crease brush, sweep the warm shadow along the crease, starting in the outer corners so that’s where the most saturation goes. To be precise, the outer corner is actually beyond not where the lash line ends but beyond that where the brow ends (creating an even bigger eye area). Dip back in the shadow a couple times to build this warm shade in layers, always starting at the outer corner and sweeping inward. Then blend everything with a bare blending brush in back and forth windshield-wiper motions along the lid, crease and brow bone.
5. With a slanted/pointed/angled eyeliner brush (that’s a preference thing), trace the lashline thickly with your black gel liner, thick enough to be visible when your eyes are open. Extend the line a little past your lash line, then blend and smudge the line with the same brush to smoke it out so it’s not a hard “line”.
6. Line your bottom lash line with the same brush and liner, making sure to also extend it out enough to connect with your top liner. ** Note: this line doesn’t need to be as thick or as dark. Most of the time there is still enough of the product left on the brush from doing the top line to trace along the bottom lash line. Make sure to also blend this line by going back and forth with the brush as your travel across so it isn’t a hard line either.
7. If your lashes are abundant enough to wear mascara, apply two coats. Curl them if they are long enough. If your lashes are too sparse or short, you still have options! You can apply individual lashes (video tutorial with Lauren coming very soon!) or apply a lash strip from your local drug store. Or skip lashes all together because you’ve achieved a “lashes effect” by smoking the dark liner along the top and bottom lash lines.
Also, Jamie and I chose matte & neutral shades for this demonstration, but once you’ve mastered the concept and techniques, you can switch any of the finishes from matte to shimmer or swap any of the colors as long as #2 is lighter than #3, and #4 is warmer. Brown eyes are the ultimate canvas for color and aren’t as limited as blue and green eyes, so have fun! I especially love jewel tones like amethyst purple, emerald green or sapphire blue for your #3 shade, framed with a copper as your #4 shade for a sunset effect.
XO Amy Nadine