makeup
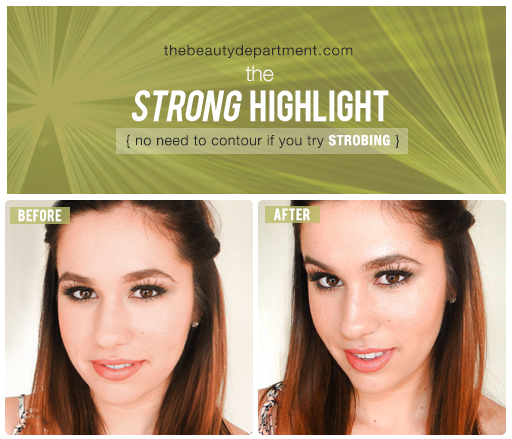
STROBING 101
TUTORIAL + PHOTOGRAPHY BY AMY NADINE, GRAPHIC DESIGN BY EUNICE CHUN
TUTORIAL + PHOTOGRAPHY BY AMY NADINE, GRAPHIC DESIGN BY EUNICE CHUN
You might have noticed that the beauty world has become obsessed with Strobing! It’s hot right now, even though it’s actually been around for ages. Basically strobing is just highlighting areas that you want the light to hit and reflect off of, bringing those features forward and stealing all of the attention. Typically we pair highlighting with contouring (revisit my Highlight & Contour Tutorial for more) but it’s quite beautiful on its own. Especially in the Summer months when we let our skin glow and come alive. So let’s take a moment to walk through how I like to do it!
TOOLS:
- Your Favorite Strobing Lotion/Fluid: This iconic one ($$) has been trusted by my peers for decades and this luminous fluid ($$$) is the one that I used on Magali above (it’s my personal favorite but pricey).
- Or Your Favorite Strobing Cream Stick: This highlighting stick ($$) is my go-to in my set bag when I can check the monitor, see the lighting and determine if she needs a little more life to her skin. I love this one ($$) for darker skin tones as well.
- Or Your Favorite Highlighting Powder: Powders instead of lotions/creams can be just as gorgeous as highlighters and this one is my favorite for light tones, this one for medium tones and this one for dark tones.
- Something To Blend & Buff It With: I used my favorite 3DHD concealer brush on Magali but you can also use a Beauty Blender (on sale!) or your finger.
STEPS:
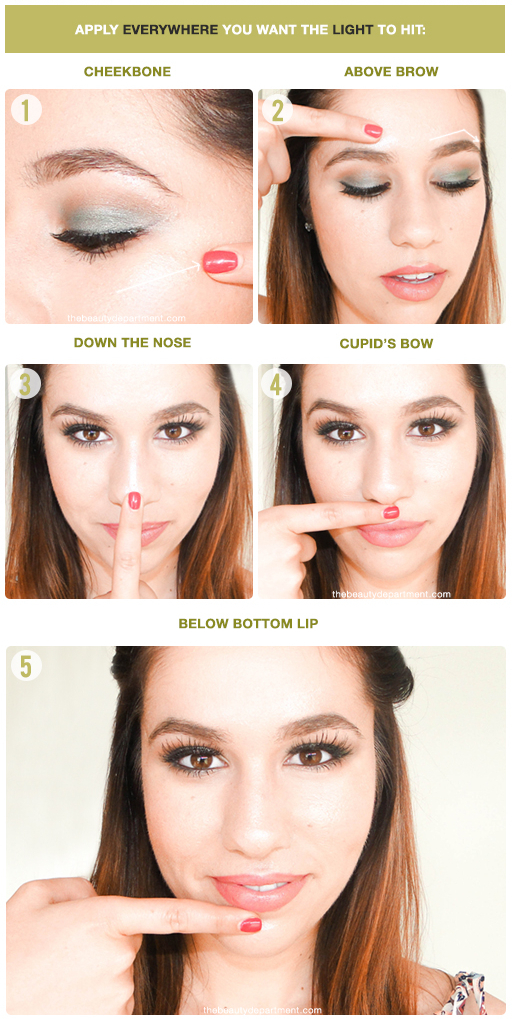
Using your finger with a cream/fluid or directly from the stick, swipe it:
- just along the top of your cheekbones,
- above your browbones (the brow frames the eye, so it’s a great place to draw attention to),
- down the center of the nose in a straight line (this just reinforces that your nose isn’t flat and protrudes away from your face like your cheekbones and browbones do),
- just above your cupid’s bow (this adds dimension to make your upper lip look like it is slightly fuller and protrudes more),
- just below your bottom lip (your bringing the area that is receding in between your bottom lip and your chin forward).
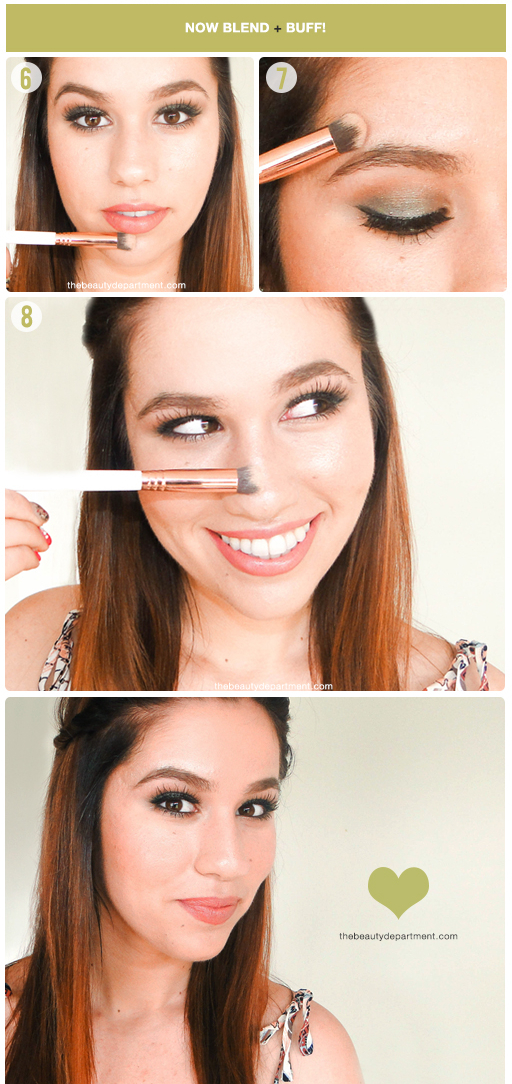
Then blend and buff it in with the brush or the sponge! And tag us on Instagram or comment below with your favorite strobing products!