makeup
WHICH BRUSH DOES WHAT: EYES

post + photos by amy nadine, graphic design by eunice chun
post + photos by amy nadine, graphic design by eunice chun
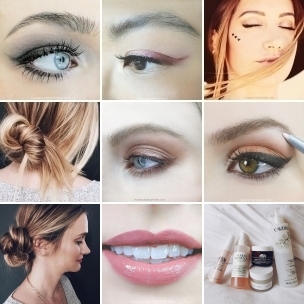
Now that we’ve covered brushes for the whole face (foundation, powder + concealer) we can move on to eye brushes. There are so many of them out there that even I get overwhelmed a little at the make-up specialty store. Which is why I have narrowed it down to these seven must-haves that you can print out and take with you next time you’re in the market for new brushes.
- LID: Look for a natural-bristled brush that is dense yet thin, tapered and medium in length (like this Sephora Allover Shadow Brush). My favorite way to use this brush is to wet it first with a little water, tap off the excess then dip it in a shadow in swirling motions to create a paste of sorts. Then swirl it on the back of your hand to perfect the consistency (might have to dip again in the shadow until it’s right) and to smooth away any clumps, then sweep it over your entire lid for a more intense effect with longer staying power. ** Note: wetting shadows works best with shimmer or metallics, not matte shades. Further, this brush also works great for your brow bone and lower lid.
- CREASE: Here you’ll want a tapered angled crease brush made of natural bristles that fits perfectly in the crease for when you want to create a smoky eye.
- SMUDGE: This brush evolved in the last few years and quickly has become a favorite of mine! A lot of my clients don’t want their liner on the bottom lid to look like a “line” so for years I would smear it with my ring finger to create more of a shadow. But a smudge brush is much more effective. Look for one with a flat head, short and dense natural bristles as it gives you the best precision for smoking out lines.
- BLENDING: This Pony Tail brush works like a windshield wiper, sweeping back and forth over both the lid and crease to blend all colors together and smooth away any hard edges. A step that you don’t want to skip, ladies! **Bonus: I use this brush often to powder the t-zone with loose powder instead of using a big powder brush, allowing your cheeks to glow. And to make a bright lip color last all night, I use this brush to powder the lips in between coats. See our tutorial on Lipstick Longevity.
- BROW: Look for a double-ended brow brush that has a spooly (looks like a mascara wand) on one end and a slanted brush on the other end so you can brush them up and over before you fill them in with a powder. If you need a refresher on brows, Lauren and I show you how here.
- LINER: Because there are so many amazing long-lasting gel liners out there now (you know them, they come in smudge pots and have revolutionized eyeliner!), you’ll need a liner brush. The slanted liner brush is also perfect for swiping across a kajal pencil then using it to line with more precision. The pointed liner brush is great for dipping into liquid liners because the longer handle will make drawing a cat eye 1000 times easier. I like the slanted one because you can also dip it in black shadow and use it to color in the waterline (the area just between your lashes and your actual eye).
Of course there are many many more eye brushes out there and I’m not suggesting you limit yourself to these seven, but these really are all you’ll ever need. But feel free to share the ones that you can’t live without too!